Smart Bike Trainers: A Complete Guide for Triathletes
Compare wheel-on, direct-drive and smart-bike setups; understand ERG mode, app control, bike compatibility, accuracy, indoor cooling and safe setup.
By Lotte
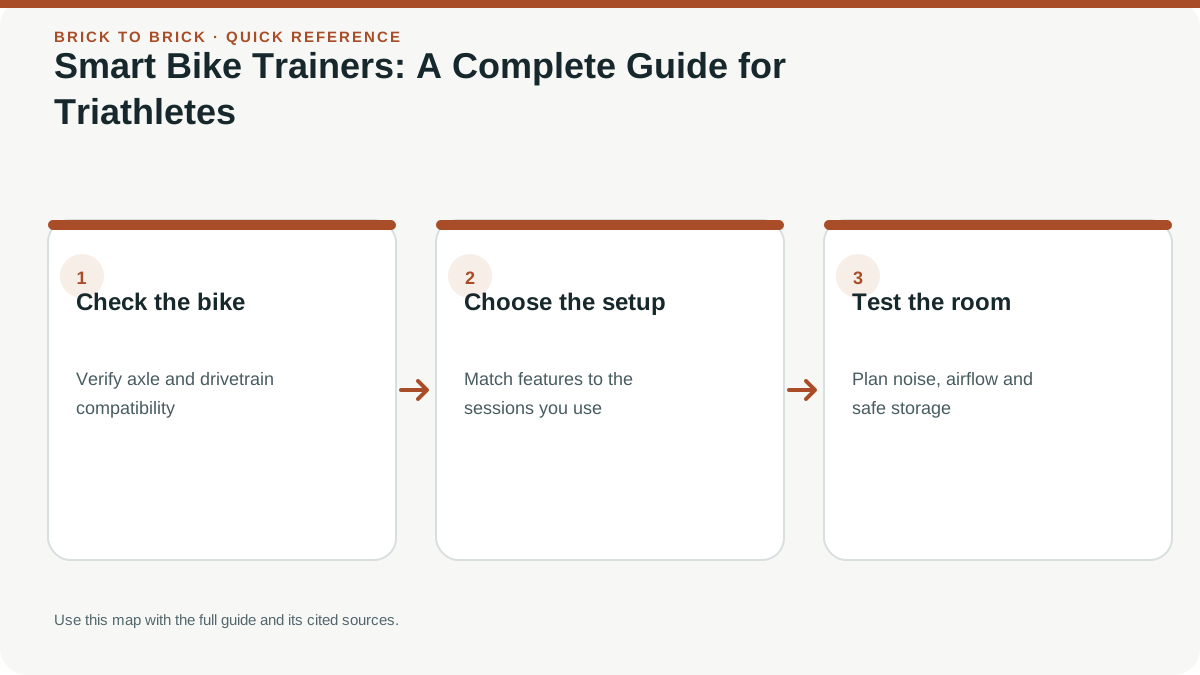
A smart trainer can control resistance and report ride data, but compatibility, accuracy, setup and software support vary by model. Choose by your bicycle, training goals and the indoor environment you can create safely.
Key takeaways
- 1Smart trainer types differ in attachment, bike compatibility, data, control and maintenance; check the exact model before buying.
- 2ERG mode targets a power value when trainer and app support it, but cadence and selected power source still matter.
- 3Manufacturer instructions govern axle adapters, frame clearance, drivetrain, calibration and maintenance.
- 4Indoor riding improves scheduling and control but does not replace outdoor bike-handling practice.
In this article
- 1What Is a Bike Trainer and Why Do Triathletes Use Them?
- 2Types of Bike Trainers Explained
- 3ERG Mode Explained Simply
- 4Training Apps: Zwift, TrainerRoad, Rouvy, and More
- 5The Complete Indoor Cycling Ecosystem: Setup Guide
- 6Beginner vs Advanced Indoor Setups
- 7Common Indoor Training Mistakes
- 8How Indoor Training Fits Your Triathlon Plan
- 9Know the difference between a data source and a controller
- 10Understand trainer accuracy and calibration claims
- 11Check bicycle frame and axle compatibility before using a trainer
- 12Manage heat, sweat and noise in a stationary setup
- 13Use ERG mode for the right kind of workout
- 14Choose a training app by your actual use case
- 15A safe first-ride checklist
- 16Indoor riding and outdoor race preparation complement each other
- 17Compare exact trainer specifications against your use
- 18Inspect a used trainer before paying
- ⚖Bike Trainer Types Compared
- ?Frequently asked questions
What Is a Bike Trainer and Why Do Triathletes Use Them?
An indoor bike trainer supports the rear wheel or replaces it so you can pedal a bicycle in place. A smart trainer can send ride data and, when the hardware and app support control, change resistance for a structured workout or simulated route. A basic trainer may provide resistance without app control. Indoor riding can make training more predictable when daylight, weather, traffic, travel or safe-road access is limited, but it does not reproduce every outdoor skill. You still need to practise bicycle handling, braking and road awareness outdoors in a suitable setting. A trainer is useful only if the bike fits securely, the equipment is compatible and the room has safe ventilation. Indoor airflow and cooling matter because the bike is stationary and lacks outdoor wind; the right setup depends on the room, rider and session. Compare trainer types by how they attach to the bicycle, what data they provide, compatibility and the kind of workout you want—not by assuming every smart trainer is more accurate or better for every athlete.
Types of Bike Trainers Explained
Wheel-on trainers hold the rear tire against a resistance roller. Setup is relatively simple and the same wheel stays on the bike, but tire pressure, roller tension and tire condition can affect feel and readings. Follow the maker's setup instructions and use a trainer tire only if the manufacturer recommends it. Direct-drive trainers replace the rear wheel: the bike's chain runs on a cassette or compatible cog attached to the trainer. They avoid rear-tire contact and can provide controlled resistance, but require the correct freehub, cassette or cog, axle adapters and frame clearance. Rollers support both wheels and require balance; some are smart, many are not. Smart bikes are dedicated stationary bicycles with adjustable fit points and integrated resistance, which can work well for shared household use but take space and require a suitable fit range. Price, noise, accuracy, maximum resistance and connectivity vary by exact model. Do not rely on broad price bands or claimed accuracy from another trainer. Before buying, check the current specification and compatibility list for your bike, drivetrain and intended apps.
ERG Mode Explained Simply
ERG mode is a control mode available when a compatible smart trainer and workout app communicate. The workout requests a target power, and the trainer adjusts resistance to help hold that target as cadence changes. It does not set an ideal cadence for you, and the displayed power can differ from another meter. If cadence falls sharply, the trainer may increase resistance to maintain the target, making it harder to turn the pedals; this is sometimes called an ERG “spiral.” Choose a comfortable gear and cadence before an interval, keep pedaling smoothly and use the app's pause, reduction or recovery controls when needed. Some apps offer a ramp or easy transition at interval changes. ERG is useful for holding a planned workload, but it is not required for effective indoor training. Resistance or slope mode lets the rider control effort through gearing and cadence, which may be useful for practicing race-specific feel. If an interval seems unexpectedly impossible, check the workout target, selected power source, trainer connection and calibration before assuming your fitness changed.
Training Apps: Zwift, TrainerRoad, Rouvy, and More
Apps can provide virtual routes, group rides, structured workouts, coaching calendars or analysis, but their libraries, supported devices and subscription terms change. Choose by the task you want to complete. If you need interval guidance, inspect how workouts are built and whether the app can control your specific trainer. If you want virtual scenery or social riding, check device compatibility, connection stability and whether the experience motivates you. If you use a coach or an existing plan, ask which calendar, workout file and data platform they support. Before subscribing, confirm trial terms, recurring billing, supported phones and screens, internet needs, data export and whether one account can control the trainer and record the session. Do not select software from an old price comparison: current pricing and included features can change by country and plan. Pair the app with the trainer's official instructions and avoid running two controlling apps at once, since competing commands can interrupt resistance changes. You can also ride without a paid training service if your trainer supports a basic mode and you have a safe, clear workout purpose.
The Complete Indoor Cycling Ecosystem: Setup Guide
Plan the whole system before you buy or mount the bike. Confirm that the trainer fits the bicycle's frame, rear axle, brake layout and drivetrain. On a direct-drive model, check cassette speed and freehub compatibility, chain condition, required spacers and correct adapters; some aerodynamic triathlon or time-trial frames need additional clearance checks. Follow the manufacturer's exact mounting steps and torque guidance. Place the trainer on a level surface, keep the bicycle stable, route cables away from moving parts and leave room to dismount. Connect only the sensors and app you need, select a deliberate power source, and test a short easy ride before starting intervals. A mat can protect flooring and help manage sweat, but it does not correct an unstable surface. Provide airflow, drinking water and a towel suited to the session and room. Update firmware and calibrate only as the specific trainer instructions require; some trainers do not need a spindown. Check device charging and connectivity before a longer workout.
Beginner vs Advanced Indoor Setups
A useful setup can be simple: a compatible trainer, a stable bicycle, a safe place to ride, a screen or timer you can see, and airflow that keeps you comfortable. A power meter, large display, subscription app, rocker plate or multiple fans may add value for some riders, but none is a requirement for beginning indoor cycling. Decide what problem an upgrade solves before spending: more accurate measurement, quieter operation, trainer control, easier bike sharing or a more comfortable position. Check the total cost, including adapters, cassette, freehub, mat, device mount, fan and any recurring software. A direct-drive trainer may require a second cassette or careful use of the bike's existing chain; a wheel-on trainer may need tire inflation and roller checks before rides. If multiple bikes will use one trainer, verify each one independently. Avoid budgeting from old article prices because products, sales, availability and subscriptions vary by region and date. The best setup is one you can mount correctly, use consistently and maintain safely.
Common Indoor Training Mistakes
A fan and airflow can improve comfort indoors, but there is no universal fan size or sweat-loss volume that applies to every athlete. Room temperature, humidity, airflow, session intensity, clothing and individual response all matter. Adjust the room and session if you feel overheated, dizzy or unwell; stop and seek appropriate help for concerning symptoms. Use familiar hydration practices rather than assuming a fixed amount per hour, and do not force fluid to match a generic number. Other avoidable problems include a bike that is not secured, the wrong axle adapter, an incompatible cassette, a towel or cable near moving parts, over-tightening hardware, ignoring unusual vibration, and leaving sweat to corrode a bicycle. Check the frame and trainer manuals for compatibility and maintenance. Start with an easy test ride after setup. Indoor sessions can feel harder because cooling and visual movement differ from outdoors, so do not translate an indoor pace or heart-rate reading directly to race-day performance. Avoid turning every ride into a threshold test; keep the workout's purpose appropriate to your training plan.
How Indoor Training Fits Your Triathlon Plan
Indoor riding can make some sessions easier to schedule and control. A structured trainer can hold a power target or simulate a gradient; a basic trainer can still support comfortable aerobic riding. Use the session type your plan calls for and adapt duration or intensity if the room, fatigue or health changes. Avoid treating a trainer app's “zone” or default workout as an individualized prescription. Threshold estimates, maximum power, heart-rate zones and platform workouts depend on the test method, device, athlete and plan. A trainer is valuable for consistency, not because every indoor ride should be hard. It also cannot fully prepare you for outdoor braking, cornering, road hazards, wind, traffic or riding in a group; practise those skills safely away from traffic or with qualified instruction. For triathlon, consider how indoor cycling fits with swimming and running so that a long or intense ride does not undermine the rest of the plan. The triathlon workout-split guide can help organize sessions, and the cadence guide explains how to interpret pedaling rate without prescribing one number for all riders.
Know the difference between a data source and a controller
A smart trainer can broadcast power, speed or cadence, while a phone, watch, cycling computer or training app may display or record that data. Another app or head unit may control resistance. These jobs can be handled by one device or several compatible devices, but the setup should be intentional. If two apps both try to control the trainer, resistance may jump, ignore the workout or disconnect. If the app records power from a separate crank meter while controlling the trainer from its internal meter, displayed power and target power may not match. Choose the power source your workout expects, connect the intended controller, and keep the display source consistent when comparing sessions. Wireless pairing limits and device compatibility vary by trainer and operating system. If power suddenly differs from your familiar readings, verify the selected source and firmware before changing your training zones. Manufacturer support pages explain the pairing and compatibility behavior for their own trainer models; do not assume every Bluetooth or ANT+ device behaves identically.
Understand trainer accuracy and calibration claims
Power accuracy is model-specific and does not mean every displayed watt is exact. Manufacturers may publish an accuracy tolerance, but that figure depends on the device, setup and conditions described in its specification. A separate bicycle power meter can disagree with the trainer because the sensors measure at different points and use different algorithms. Compare consistency over time rather than expecting two devices to show identical numbers. Some trainers request a spindown calibration after setup, transport or warm-up; others specify no user calibration. Follow the exact product manual instead of performing a generic calibration every ride. Keep firmware current and use the calibration procedure only when instructed. If readings are erratic, check tire pressure and roller tension on wheel-on models, cassette installation and freehub fit on direct-drive models, and sensor pairing for both. Never adjust training intensity solely to make one number match another without understanding which device is controlling the workout. If accuracy matters for a coaching plan, tell the coach which power source you use and keep it consistent.
Check bicycle frame and axle compatibility before using a trainer
A trainer can support common quick-release and thru-axle formats and still be incompatible with a specific bicycle. Confirm rear spacing, axle diameter and thread pitch, adapter requirements, cassette body, chain speed, brake-caliper clearance and frame shape. Some time-trial and triathlon frames have aerodynamic seatstays or chainstays that may contact the trainer housing; a product's general “fits most bikes” claim is not enough. Manufacturer lists may identify known incompatibilities but cannot cover every custom or older frame. Follow both bicycle and trainer instructions, particularly when the bicycle uses carbon or unusual materials. Do not force an adapter, substitute a random axle or ride if the bicycle shifts, rocks or contacts the trainer. If a model-specific answer is unclear, ask the bicycle and trainer manufacturers or a qualified mechanic. Garmin's Tacx NEO setup guide and Wahoo's KICKR compatibility resources provide examples of why axle and frame checks are separate from drivetrain checks.
Manage heat, sweat and noise in a stationary setup
Stationary riding changes the environment: you do not move through air, sweat can land on the bicycle and floor, and vibration can travel into an apartment or shared room. Provide airflow appropriate to the space and session, keep water and a towel within reach without placing them near the drivetrain, and protect sensitive components from sweat according to the bicycle and trainer manuals. If noise is a concern, check for a level floor, a stable mat, correct axle installation, cassette play, loose parts and drivetrain wear before assuming the trainer is defective. A thick mat may reduce transmitted vibration but can also change trainer stability, so follow the maker's guidance. Keep the area free of pets, children, loose cables and objects that could enter a spinning wheel or crank. Stop if the bike shifts or a new clunk, rubbing noise or frame contact appears. Clean and dry equipment after use using product-safe methods; do not spray lubricant or cleaner into the trainer's electronics.
Use ERG mode for the right kind of workout
ERG mode can reduce the need to shift during steady intervals because the trainer changes resistance to target the requested power. It can be useful for controlled intervals, but it is less helpful when the workout goal is to practise choosing gears, respond to terrain or hold a self-selected race effort. If cadence falls during a hard interval, the trainer may make each pedal stroke feel heavier while it tries to maintain the same power. Shift to a comfortable gear before the work interval, keep cadence smooth and use an easy ramp or pause if the effort is not manageable. For a workout where cadence varies intentionally, check whether the target power and cadence instructions work together in the app. Avoid relying on ERG to rescue a plan that starts too hard. Resistance mode allows the rider to change effort through gears and pedaling; simulation mode follows a virtual grade when supported. Learn how the chosen app names its modes and what happens if the trainer loses connection.
Choose a training app by your actual use case
Make a short list of what you will do most often: follow a coach's structured workouts, ride virtual routes, join group rides, analyse training data, or use a simple timer. Check whether each app supports your trainer and device combination, can both control and record the data you need, and works in your training space. Ask whether an internet connection is needed for the feature you want, what happens when connectivity drops, how workouts are exported and whether subscriptions renew automatically. If family members use the same device, compare account and profile behavior. Test free trials only after reading the renewal terms. A platform's current feature list and price can change, so check its official plan page at the time of purchase. You can also choose a basic timer and ride by perceived effort if structured control is not useful to you. There is no need to keep multiple subscriptions simply because a trainer can connect to them.
A safe first-ride checklist
Before the first ride, place the trainer on a level surface and confirm the feet or frame are stable. Install the correct axle adapters and make sure the bicycle is secured exactly as the manufacturer instructs. Spin the cranks by hand to check that the chain, derailleur, brake and frame clear the trainer. Confirm the cassette is the right speed and shifts cleanly, or that a compatible virtual shifting system is set up. Pair the trainer with one intended controlling app and confirm that power or resistance changes respond at low effort. Start with a short, easy ride and dismount to recheck the setup if anything moves or sounds abnormal. Use safe airflow, keep loose clothing and cables away from moving parts, and position a towel where sweat will not drip onto controls. If your bike is a triathlon or time-trial model or uses an unusual axle or frame design, confirm compatibility before riding. Stop if the connection causes unpredictable resistance or the bicycle feels unstable.
Indoor riding and outdoor race preparation complement each other
An indoor trainer can provide repeatable power and remove interruptions from traffic or weather, which makes it useful for some sessions. It cannot reproduce the full demands of riding outside: steering, braking, cornering, scanning, road surface, wind, drafting rules and pacing over changing terrain all require separate practice. Plan at least some safe outdoor handling experience if your event includes a road bike leg, using routes and instruction appropriate to your confidence and local laws. Do not take an indoor workout's speed estimate as a promise of outdoor speed; virtual speed depends on app settings and simulated conditions. Similarly, a controlled trainer interval does not show whether you can maintain the same effort over a race course and still run. Balance indoor convenience with course-specific skills. The cycling-route guide can help identify safer practice routes, while the bike gearing guide explains how to choose gears for terrain.
Compare exact trainer specifications against your use
When two trainers look similar, compare the exact model year and the functions you will use. Check the maker's published power-accuracy method, controllable resistance range, maximum simulated gradient if route simulation matters, supported wireless protocols, data fields, calibration requirements, noise guidance, axle formats, cassette options, frame-compatibility list, warranty and service availability. A maximum wattage or incline figure is not a direct measure of road feel, and greater resistance capacity may have little value for a rider who wants steady endurance sessions. Responsiveness and simulation behavior depend on both the trainer and app. Motion systems can change comfort for some users but add cost and setup considerations. See whether the trainer supports the workout platform and device you already own before buying a new screen or subscription. Specifications can change across revisions and product generations, so record the full model number and check its current manual. Read reviews for reliability and noise patterns, but treat individual experience as one data point rather than a guarantee for your room or bike.
Inspect a used trainer before paying
A second-hand trainer can be a practical option if the exact model still meets your needs and can be supported. Ask for the model and serial number, included axle adapters, power supply, cassette or freehub body, original manual and proof of purchase if available. Confirm whether the model still receives firmware or app support and whether its compatibility information covers your bicycle. If possible, test it with your bike or a compatible demo bike: check that the unit powers on, pairs with an app, changes resistance, reports plausible data and runs without unexpected knocking, scraping, rocking or electrical odor. A seller's training file does not prove that the power reading is accurate. Check the current manufacturer warranty and any exclusions for second owners, then compare the saving with the risk of missing parts, repair or shipping. Do not mount a bike on a trainer with a damaged frame, uncertain axle fit or unknown resistance behavior. If you cannot verify compatibility or basic function, choose another unit or get help from a qualified shop before riding.
Bike Trainer Types Compared
| Feature | Wheel-On | Direct-Drive | Smart Trainer |
|---|---|---|---|
| Price range | $80–350 | $300–900 | $400–1,500 |
| Power accuracy | ±5–8% | ±1–3% | ±1–2% |
| Noise level | Loud | Quiet | Very quiet |
| Road feel | Basic | Good | Realistic |
| ERG mode | No | Some models | Yes |
| App integration | Limited | Some | Full |
| Tire wear | Yes | No | No |
| Setup complexity | Easy | Moderate | Moderate |
| Best for | Casual use | Regular training | Serious training |
Recommended gear
Affiliate disclosure: Brick to Brick may earn a commission from qualifying purchases, at no extra cost to you. Read our full affiliate disclosure. Unless a named method says otherwise, these are research-based recommendations rather than first-hand product tests.
Smart Direct-Drive Trainer
Quiet, accurate, app-connected trainer for serious indoor training.
View on AmazonSources
Sources are listed so readers can verify consequential claims and dated details.
- Wahoo trainer support — Wahoo Fitness (accessed August 19, 2026)
- Garmin Tacx support — Garmin (accessed August 19, 2026)
- Tacx Smart Trainer features, accuracy and calibration — Garmin / Tacx (accessed September 25, 2026)
- Set up a Tacx NEO or NEO 2 smart trainer — Garmin / Tacx (accessed September 25, 2026)
- KICKR CORE setup — Wahoo Fitness (accessed September 25, 2026)
- KICKR product information and setup — Wahoo Fitness (accessed September 25, 2026)
- Bike compatibility with Tacx NEO 3M — Garmin / Tacx (accessed September 25, 2026)
- KICKR noise, vibration and compatibility troubleshooting — Wahoo Fitness (accessed September 25, 2026)
Frequently asked questions
Do triathletes need a smart bike trainer?
No. A trainer can make indoor cycling more convenient or structured, but a basic trainer or safe outdoor riding may suit your needs. Outdoor handling still requires suitable practice.
What is the difference between a wheel-on and direct-drive trainer?
A wheel-on trainer places the rear tire against a resistance roller. A direct-drive trainer replaces the rear wheel and requires compatible axle adapters and a cassette or other drivetrain system.
Does ERG mode control cadence?
No. ERG mode adjusts trainer resistance to target a requested power when supported; the rider still chooses cadence. If cadence drops, the required pedal force can feel harder.
Are all smart trainers compatible with triathlon bikes?
No. Check frame clearance, rear axle, drivetrain, freehub or cassette, brake and trainer model. Some aerodynamic frames have compatibility limitations.
How often should I calibrate a smart trainer?
Follow the exact manufacturer's instructions. Some trainers require a spindown under specified conditions; some models do not need user calibration.
Can an indoor trainer replace outdoor cycling?
It can replace some conditioning rides, but it does not teach outdoor handling, braking, cornering, road awareness or group riding. Practise those skills safely for your event.