Triathlon Bike Maintenance for Beginners: Safe Checks and Skills
Learn practical pre-ride checks, tyre and chain care, flat repair basics, brake warning signs and when a triathlon bike needs a qualified mechanic.
By Lotte
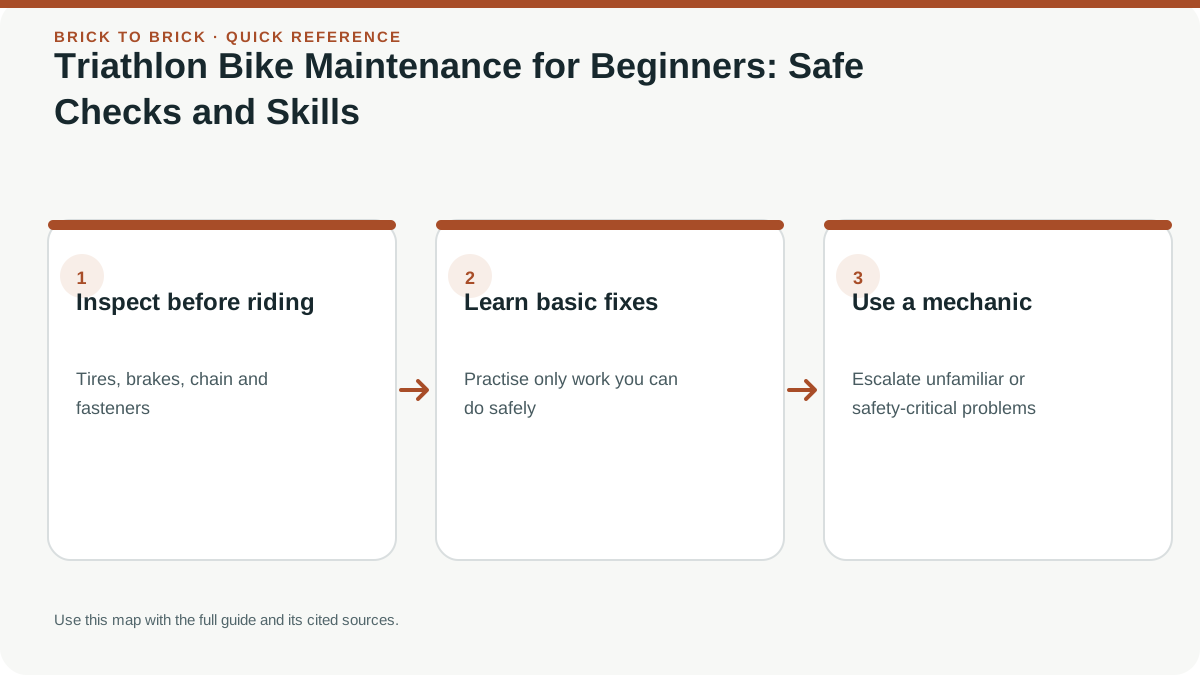
Beginner maintenance is about noticing problems, following component-specific instructions and knowing when to stop and get qualified help. This guide covers repeatable safety checks and sensible home tasks without universal torque, pressure or service-interval prescriptions.
Key takeaways
- 1Inspect tyres, wheels, brakes and controls before rides; stop if a safety-critical part is uncertain.
- 2Use manufacturer instructions for pressure, torque, lubrication, wear and service intervals.
- 3Practise flat repair with your exact wheel and tyre setup before relying on it roadside.
- 4Brake, wheel, carbon, steering and hydraulic work may require a qualified mechanic.
- 5Test repairs in a low-risk area and keep maintenance records.
In this article
- 1Quick answer: what bike maintenance does a triathlete need to know?
- 2The toolkit: what you actually need
- 3Skill 1: Clean and lube the chain
- 4Skill 2: Check and inflate tire pressure
- 5Skill 3: Fix a flat tire (5-minute drill)
- 6Skill 4: Adjust brakes (rim and disc)
- 7Skill 5: Check bolt torque (carbon = critical)
- 8Skill 6: Inspect cables and housing
- 9Skill 7: Recognize wheel problems and know when to use a shop
- 10Skill 8: Check chain wear
- 11Skill 9: Clean the cassette and drivetrain
- 12Skill 10: A pre-ride and pre-race safety check
- 13Maintenance schedule cheat sheet
- 14A beginner-friendly pre-ride check
- 15Know which jobs are reasonable at home
- 16After a crash, transport or long storage
- 17Prevent contamination and protect your workspace
- ⚖DIY vs shop: when to pay a mechanic
- ?Frequently asked questions
Quick answer: what bike maintenance does a triathlete need to know?
A beginner should be able to notice problems before a ride, keep the drivetrain reasonably clean, check tyres and brakes, carry a repair kit they know how to use, and arrange qualified help for adjustments outside their skill. Maintenance intervals and specifications vary by bicycle, components, riding conditions and manufacturer. There is no universal weekly schedule that prevents a fixed percentage of mechanical failures.
Start with the owner's manuals for the frame, wheels, tyres, brakes and drivetrain. Learn the pre-ride check before attempting repairs. If a brake, wheel, steering part, carbon component or electronic system is damaged or unfamiliar, stop riding and ask a qualified mechanic. A roadside repair should be practised in training, but do not experiment with safety-critical adjustments just before a race.
The toolkit: what you actually need
Build a toolkit from the bicycle you own and the failures you can safely address. A basic ride kit may include the correct tube or repair plug for the tyre system, tyre levers that fit the rim, a pump or compatible inflation system, a multi-tool that fits your fasteners, and a quick link only if you know how to use it with the chain. Tubeless tyres may require sealant and plugs; electronic shifting or thru-axles create different needs. Verify compatibility before buying.
At home, a floor pump with a reliable gauge, clean rags, bicycle-specific chain lubricant and manufacturer-approved cleaners can cover routine tasks. A torque wrench is appropriate for specified fasteners, but the range must fit the component and the tool must be used correctly. Do not buy tools just to attempt work that requires special training. Keep chemicals away from children and follow the product label. A local shop can help assemble a kit for your frame and wheels.
Skill 1: Clean and lube the chain
A clean, appropriately lubricated chain runs more quietly and helps protect the drivetrain. How often to clean and lubricate depends on weather, dirt, mileage, lubricant type and manufacturer advice; there is no fixed distance interval for everyone. Wipe visible grime from the chain after a dirty ride and follow the lubricant instructions. Some lubricants require a clean, dry chain, a specific curing time or a particular application method.
Avoid spraying degreaser indiscriminately near brakes, tyres, bearings or seals. Use a product intended for bicycle components, protect braking surfaces and wipe away excess lubricant because it can attract dirt. Do not mix incompatible wax and oil systems without following their preparation instructions. If you use a wax-based lubricant, its cleaning process differs from many drip lubes. Ask a mechanic if the chain remains noisy, stiff or contaminated.
Skill 2: Check and inflate tire pressure
Inspect tyres for cuts, bulges, embedded glass and exposed casing, and confirm that the valve and wheel are secure. Set pressure within the tyre and rim makers' limits using a compatible pump and gauge. The correct pressure depends on tyre width and construction, total system weight, wheel, tube or tubeless setup, road surface, weather and rider preference. The generic PSI table in older versions of this page should not be used as a prescription.
Use a current pressure calculator only as an estimate and confirm that its result stays within component limits. Avoid inflating to the sidewall maximum by default. Too much or too little pressure can reduce control or damage equipment. The triathlon tyre pressure guide explains how to approach a baseline. If you are unsure about hookless rim compatibility, tyre size or sealant, consult the wheel and tyre manufacturers before riding.
Skill 3: Fix a flat tire (5-minute drill)
Practise a flat repair with your exact wheel, tyre, axle, brakes and inflation system before you need it on the roadside. There is no five-minute requirement. Work on a stable surface, shift to an appropriate gear if your drivetrain instructions call for it, and follow the bicycle maker's wheel-removal directions. Never force a tyre lever against a carbon rim or use a tool not approved for the wheel.
After removing a tube or tyre, carefully check for the puncture cause without dragging a bare finger over glass or wire. Inspect the tyre and rim tape, install a correctly sized replacement or repair only if the tube maker's instructions allow it, seat both beads evenly, inflate within limits and verify the tyre is seated before riding. Reinstall the wheel securely and test brake function. Tubeless repairs have separate procedures. If a tyre is cut, the casing is exposed or the wheel will not seat, do not ride it; seek assistance.
Skill 4: Adjust brakes (rim and disc)
Before each ride, confirm both brakes engage and release, the levers do not pull to the handlebar, and pads or rotors are not visibly damaged or contaminated. Brake pad position, wear limits, cable tension, rotor clearance and bleed procedures are component-specific. Do not use a generic gap or caliper-alignment trick across all systems.
Follow the brake manufacturer's service manual. Keep oil, chain lubricant and household cleaners away from pads and rotors. Do not touch a rotor after braking because it may be hot. If a disc brake rubs, lever feel changes, fluid leaks, a rotor is bent or the brake is noisy after cleaning, identify the approved troubleshooting procedure or visit a shop. New pads and rotors may need a specified bed-in procedure. Never test a brake repair for the first time in traffic or on a descent.
Skill 5: Check bolt torque (carbon = critical)
A torque wrench can help prevent under- or over-tightening, but exact torque values must come from the component maker's instructions. There is no universal stem, handlebar, seatpost or bottle-cage value. A frame, seatpost, stem and bar may have different limits and tightening sequences. Carbon assembly paste is appropriate only where the relevant manufacturer recommends it; grease and paste are not interchangeable.
Use a calibrated wrench of suitable range, correct bit and smooth technique. Do not extend the handle, guess at a value or repeatedly “check” fasteners beyond the required procedure. If a component slips, creaks, cracks or has damaged threads, stop riding and ask a mechanic. Carbon parts are not automatically damaged only by over-tightening, nor are they immune to impact or fatigue; inspect after a crash and follow manufacturer guidance.
Skill 6: Inspect cables and housing
On a mechanical system, look for frayed or kinked cables, cracked housing, sluggish shifts and changes in brake feel. Electronic systems need their own battery, firmware and connection checks. Service intervals differ by component and use, so do not assume every cable needs annual replacement or each hydraulic system needs a bleed at a fixed two-year interval. Check the maker's maintenance schedule and get service when performance changes.
Do not ride if a brake cable is fraying, a hydraulic line leaks, a lever reaches the bar or shifting is too unreliable to control the bike. Internal routing and hydraulic work can require specific tools and training. If a cable needs replacement and you do not know how to route and secure it, ask a shop. A short visual inspection can identify a concern; it cannot confirm that an unseen cable or hydraulic system is safe.
Skill 7: Recognize wheel problems and know when to use a shop
A wheel that visibly wobbles, has a loose spoke, makes repeated brake contact or changes shape after an impact needs inspection. Wheel truing requires the correct spoke wrench, a stable truing stand and knowledge of the rim, hub and spoke system. Turning the wrong nipple can worsen the wheel or damage a spoke. It is not a necessary beginner skill and the old step-by-step adjustment direction should not be followed as a universal rule.
Do not ride a wheel with a cracked rim, loose or broken spokes, a damaged tyre bed or a wobble that affects braking or frame clearance. Stop and contact a qualified wheel builder or bicycle mechanic. After a hard impact, check for damage even if the wheel spins. Minor cosmetic movement should still be assessed against the wheel manufacturer's service limits.
Skill 8: Check chain wear
A chain checker estimates wear, but tools may use different measurement methods and chain makers may specify different replacement guidance. Do not apply a single percentage threshold to every chain or assume a new chain will preserve a cassette for a guaranteed number of replacements. Clean the chain first, use the gauge as directed, and compare the result with the chain or tool manufacturer's instructions.
If the chain skips under load, has stiff links, rust, damage or an uncertain wear history, have it inspected. A badly worn chain can accelerate wear in connected components, but waiting or replacing it too early both have costs. Ask a mechanic to check the chain and cassette together if you are unsure. Replace worn components with compatible parts and verify the drivetrain under controlled conditions before a hard ride.
Skill 9: Clean the cassette and drivetrain
Clean the cassette and jockey wheels when dirt buildup affects operation or when the chain-cleaning process calls for it. Remove the wheel only if you know how to reinstall it correctly. Use tools that fit the cassette and follow component guidance. Do not use a screwdriver or abrasive tool that can damage teeth, bearings or seals. Avoid solvent contact with brakes and tyres.
There is no guaranteed extra distance or watt saving from a monthly cassette scrub. The purpose is to remove contamination, notice wear and help the drivetrain function. If shifting remains poor after cleaning and lubrication, the cause may be adjustment, worn parts, a bent hanger or compatibility issue. A mechanic can diagnose the system rather than applying more cleaner or lubricant.
Skill 10: A pre-ride and pre-race safety check
Use the event's check-in and equipment rules, then inspect the bicycle at home and again before racing. Confirm tyres are undamaged and set within manufacturer limits, wheels are secured, brakes function, the chain runs smoothly and the cockpit feels stable. Check that the saddle, bars and accessories are secure using the correct values and tools. Inspect the helmet according to its manufacturer and replace it after an impact where directed.
Do not tighten every bolt immediately before a race unless there is a reason and you know the required value. Verify shifting, brakes and wheel fit on a short safe ride after any service. Pack a repair kit compatible with your setup and practise its use. If a serious defect remains, have a mechanic inspect it or do not race on that bike. A checklist catches visible problems; it does not certify hidden damage.
Maintenance schedule cheat sheet
Use the owner's manual and a mechanic's guidance for intervals. A practical habit is to inspect tyres, brakes and wheel security before rides, wipe down the bike when dirty, and respond promptly to new noise, shifting changes, play or fluid leaks. Wet, dusty or high-mileage conditions may require more frequent cleaning or service than dry, light use. Electronic, hydraulic and suspension components have manufacturer-specific care instructions.
Avoid replacing chains, cables, pads or bearings on an arbitrary calendar if the maker specifies another interval, but do not ignore wear because a schedule is not due. Keep maintenance records and note crashes, transport damage, part replacements and unusual symptoms. When your bike has carbon or proprietary integrated components, use an authorized service provider when the maker requires one.
A beginner-friendly pre-ride check
A pre-ride inspection takes little time and is safer than assuming yesterday's setup remains correct. Use the same sequence each time so a step is not forgotten. With the bike stationary, check that wheels are installed and secured, tyres have no visible damage and brakes engage. Lift the bike a short distance and set it down gently to listen for loose items; do not strike carbon components. Spin each wheel and watch for contact with the frame, fork or brake.
| Check | What to notice | What to do if it is wrong |
|---|---|---|
| Tyres and wheels | Cuts, bulges, low pressure, loose axle or wheel movement | Inflate within limits, repair correctly or have the wheel inspected |
| Brakes | Lever feel, return, rotor or rim condition | Do not ride if braking is weak, leaking or uncertain |
| Drivetrain | Chain present, smooth rotation and no obvious damage | Stop if chain or crank is loose, bent or skipping |
| Steering and saddle | No unusual play or movement | Use maker's torque instructions or ask a mechanic |
| Helmet and lights | Fit, damage, battery and visibility needs | Replace damaged safety equipment and charge as required |
The check does not require a precise torque check every time. Repeated tightening without a reason can damage fasteners. If any safety-critical item is uncertain, do not test it on a busy road; resolve the issue in a workshop or with a qualified mechanic.
Know which jobs are reasonable at home
A beginner can learn to wipe a chain, inspect a tyre, fit a tube, install a bottle cage to a specified torque or replace a wheel if the component instructions are clear. The word “basic” does not mean “risk free”: use a stable stand where appropriate, the correct tools and a quiet place to work. Do not hurry maintenance late at night before a race.
Work that affects braking, steering, carbon parts, suspension, wheel structure, electronic wiring or hydraulic fluid may require specialized tools and training. If a manual warns that a task should be completed by an authorized dealer, follow it. A mechanic is also useful when an adjustment does not hold, a part is proprietary or you cannot identify the cause. Getting help early may prevent a small issue becoming an unsafe one.
After any repair, test the bike in a quiet, low-risk area. Check the relevant system at walking speed first, then increase effort only when it behaves normally. Do not ride if a brake does not stop reliably, a wheel is insecure, steering feels loose or a tyre is improperly seated. Write down the work done and parts used; this makes future diagnosis easier.
After a crash, transport or long storage
A crash can damage components that look normal from a distance. Inspect the helmet according to its manufacturer, and check frame, fork, bars, wheels, brakes and drivetrain for cracks, dents, alignment changes or unusual sounds. Carbon damage can be difficult to see, so seek a qualified inspection after a significant impact. Do not use a cracked or questionable component while waiting for an assessment.
Transport can loosen or damage equipment, especially if the bike is placed in a case, rack or vehicle with pressure on the frame. After reassembly, confirm the wheels and axles are secure, controls are aligned, brakes work and shifting is functional. Check that the rotor is not contaminated or bent. If an airline case has taken a hard impact, document it and inspect the bicycle before riding.
For a bike stored for months, check tyre condition, chain corrosion, battery charge and manufacturer storage recommendations. Do not assume a flat tire or a charged battery means the bike is ready. Inflate to an appropriate pressure, inspect seals and controls, and test braking and shifting in a safe location. A shop service may be sensible when service history is unknown.
Prevent contamination and protect your workspace
Degreaser, lubricant, brake cleaner and sealant can damage paint, rubber, brake pads or skin when misused. Read product labels, work in a ventilated space, wear any recommended protection and keep chemicals away from children and pets. Do not pour chemicals or old sealant into drains unless local disposal rules permit it. Use a dedicated rag for drivetrain work and keep it away from braking surfaces.
Clean rotors only with a product approved by the brake manufacturer and avoid touching the braking track with oily hands. Contaminated pads may not recover with a simple wipe; follow the manufacturer's replacement guidance or ask a shop. Separate tools used for grease from tools used near brakes where practical. Keep the bike stable on a stand so it cannot fall onto a person or damage a derailleur.
A tidy workspace reduces mistakes. Lay out tools before beginning, use the exact bit size and return fasteners to their proper location. Stop if a bolt resists, threads feel damaged or you cannot identify the next step. Forcing a fastener often costs more than asking for help.
Dispose of worn chains, tubes, sealant, batteries and chemical containers according to local waste rules. Some bike shops accept tubes or used parts for recycling, but programs vary. Do not leave a removed axle, sharp spoke or open blade where a family member might find it. Store the repair kit so it is accessible before a ride but separated from food and medication. These housekeeping steps do not replace mechanical skill; they make routine work safer and reduce contamination.
When you book a professional service, describe symptoms rather than asking only for a generic “tune-up.” Mention when the noise occurs, whether it started after transport or a crash, and which conditions make it worse. Bring the wheel, charger or accessory involved if relevant. Ask what was inspected and whether any part was replaced so you can keep a useful record. A mechanic can then explain follow-up checks specific to your bike rather than relying on a universal calendar.
For a roadside issue, first move away from traffic and make yourself visible. If you cannot safely identify the problem or complete the repair, call your support person, event assistance or local roadside service. Do not stand in a narrow shoulder while working on a wheel, and do not test a repair while moving into traffic. A spare tube does not help when a tyre casing is split or a wheel is damaged; know when to stop. On race day, tell an official if you withdraw so the timing and safety team can account for you. Your event's rules define how to report a mechanical and whether outside assistance is permitted.
Make a simple record of date, distance or conditions, work performed, parts and any symptom that remains. It helps a professional mechanic identify a recurring fault and prevents you from forgetting which component was replaced. Keep receipts and warranty information for major parts. If the bike is used for racing, verify that replacements are compatible with the frame, wheels and event rules. An online forum can point toward a question, but it cannot inspect the bicycle; unresolved safety concerns belong with a qualified mechanic.
If you are travelling with a bike, schedule service early enough to fix a discovered problem without rushing. Do not make a major equipment change the day before a race unless a safety issue requires it. After a new part or adjustment, take a short local ride and verify that the bicycle behaves normally. Keep the mechanic's contact details and part specifications with your travel records in case a local shop needs them.
DIY vs shop: when to pay a mechanic
| Job | DIY? | Shop cost |
|---|---|---|
| Clean & lube chain | Yes — easy | — |
| Fix a flat | Yes — must-know | $10–15 |
| Adjust derailleur | Yes with practice | $25–40 |
| Replace cables | Yes with patience | $40–80 |
| Hydraulic brake bleed | Shop | $30–50 |
| Wheel truing (major) | Shop | $15–30 |
| Bottom bracket replacement | Shop | $40–80 + part |
| Headset overhaul | Shop | $30–60 |
Recommended gear
Affiliate disclosure: Brick to Brick may earn a commission from qualifying purchases, at no extra cost to you. Read our full affiliate disclosure. Unless a named method says otherwise, these are research-based recommendations rather than first-hand product tests.
Park Tool AWS-3 Hex Wrench Set
Industry-standard Allen keys (2–8 mm) — every triathlete needs one.
View on AmazonTopeak Torq Stick (4 Nm or 6 Nm)
Pre-set torque wrench for carbon parts. Prevents cracked stems and bars.
View on AmazonLezyne Classic Floor Drive Pump
Accurate gauge, durable build, fits Presta and Schrader.
View on AmazonPark Tool CC-3.2 Chain Checker
$10 tool that saves $200+ in drivetrain replacement.
View on AmazonSquirt Long-Lasting Chain Lube
Clean wax-based lube — minimal mess, long life, fast watts.
View on AmazonSources
Sources are listed so readers can verify consequential claims and dated details.
- Bicycle owner resources and safety guidance — U.S. Consumer Product Safety Commission (accessed September 25, 2026)
- Bicycle maintenance resources — Park Tool (accessed September 25, 2026)
- 2026 IRONMAN Competition Rules — IRONMAN (accessed September 25, 2026)
Frequently asked questions
How often should I service a triathlon bike?
Follow the bicycle and component makers' schedules and consider riding conditions, mileage and symptoms. There is no single service interval for every bike; a mechanic can inspect parts when performance changes or history is unknown.
Can I use car oil on a bicycle chain?
Use a lubricant intended for your bicycle chain and follow the drivetrain or lubricant maker's instructions. Automotive oils may attract dirt or be unsuitable for the system.
How long does a bike chain last?
Chain life varies with conditions, lubrication, load and drivetrain. Measure it with an appropriate tool as directed by its maker rather than relying on a universal mileage figure.
Do I need a torque wrench?
A torque wrench is useful for fasteners with specified values, especially when a maker requires one. It must have a suitable range and be used correctly; follow component instructions or ask a mechanic.
Can a beginner adjust bicycle brakes?
A beginner can check whether brakes function, but adjustment and hydraulic service are component-specific. Do not ride if braking is weak or uncertain; use the manufacturer's service guide or a qualified mechanic.
What is the most common race-day bike mechanical?
This guide does not assign a universal most-common failure because incidents vary by race and source. Pre-ride inspection, a compatible repair kit and practice reduce avoidable surprises but cannot eliminate mechanical problems.