Triathlon Tire Pressure: Compatibility Before PSI
Choose bike tire pressure from the exact tire, rim, load and surface, then verify limits and test handling instead of copying a rider-weight chart.
By Lotte
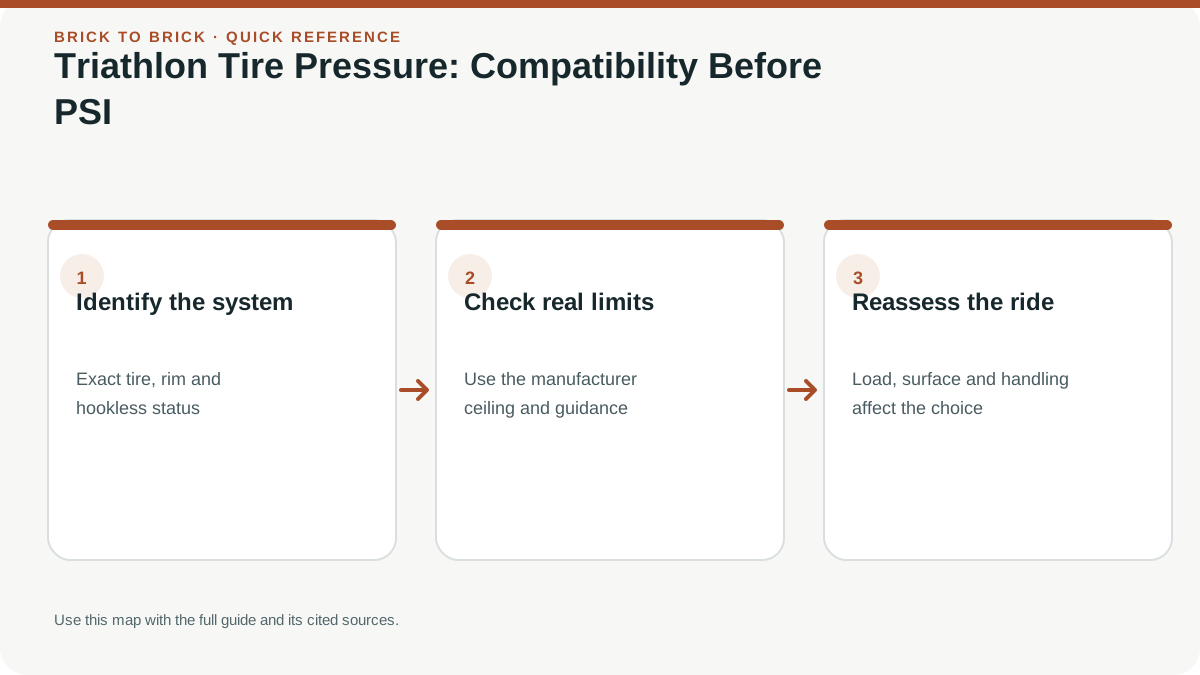
There is no universal fastest PSI. Verify the exact tire-and-rim combination and all pressure limits, use the maker’s guidance for your loaded front and rear wheels, then test a permitted setting on a familiar route.
Key takeaways
- 1Compatibility comes first: verify the exact tire, rim, size, construction and applicable pressure limits.
- 2Treat a sidewall or rim maximum as a ceiling, not a target or a pressure recommendation.
- 3Use the calculator’s requested load and width inputs; many tools provide separate front and rear starting values.
- 4A wider tire, tubeless setup or smoother course does not create one universal pressure rule.
- 5Use the same gauge and familiar route to test one permitted change at a time before race day.
In this article
- 1Identify the complete wheel system
- 2What tire pressure changes on the road
- 3Why front and rear pressures are often different
- 4Marked tire width and mounted width are not always identical
- 5Tube, tubeless and tubular setups need different checks
- 6Convert psi, bar and kPa without changing the setting
- 7Choose for the course you will ride, not a lab number alone
- 8Separate a maximum limit from a recommended setting
- 9Gather the inputs before using a pressure calculator
- 10Test a permitted range on a familiar route
- 11Use a repeatable race-morning check
- 12Record changes that justify a new assessment
- 13Build a pressure record that another mechanic could understand
- 14Inflate a familiar, compatible system in a controlled sequence
- 15Troubleshoot a pressure change before selecting a new target
- 16Read the tire and rim instructions as one system
- 17Four equipment changes that deserve a fresh pressure assessment
- 18Distinguish a useful comparison ride from a rolling-resistance test
- 19Keep a mechanic handoff concise when something remains wrong
- ?Frequently asked questions
Identify the complete wheel system
There is no single correct triathlon tire pressure for every rider. The safe starting point is the exact tire-and-rim combination: confirm that the models and sizes are approved together, find every applicable pressure limit, then use the tire or wheel maker’s starting guidance for your loaded setup. Test a permitted setting on a familiar route before race day; never treat a maximum rating as a target.
Write down the rim model and internal width, tire model and marked size, actual measured width where required, and whether the setup uses tubes, tubeless or tubular tires. Note whether a tubeless rim is hooked or hookless.
“28 mm tire” is not enough information to prescribe pressure. Different rims can change mounted width and impose different compatibility or pressure limits. The same product family can include model generations with different requirements. If the tire-and-rim combination is not explicitly permitted, lowering pressure or adding an inner tube does not automatically make it safe.
What tire pressure changes on the road
Air pressure supports the rider and bicycle through the tire casing. As the tire rolls, its casing flexes around the contact patch and over small surface features. Pressure, tire volume, casing construction, load and surface all affect how that system behaves. That is why “more pressure is faster” is too simple for a triathlon bike.
On very smooth surfaces, reducing casing deformation can reduce one kind of rolling loss. On imperfect roads, a very firm tire can transmit more vibration through the bicycle and rider instead of following small surface irregularities. A lab study that measures pressure on smooth asphalt is answering a different question from a rough road or an event course. Its result should not be copied as a universal race setting.
Too little pressure for the tire and load can make a setup feel unstable, increase the chance of a rim impact or pinch flat, and compromise safe cornering. Too much can produce a harsh ride and poor contact over rough patches. The useful setting balances the whole approved system; it is not simply the highest number that fits on the tire sidewall. Continental similarly cautions that very high pressure can make a road tire harsh over surface imperfections.
Why front and rear pressures are often different
The two wheels do not necessarily carry the same load. Rider position, frame geometry, body shape, bottle and storage placement, and any carried kit affect how weight is shared. The rear wheel often carries more, but there is no safe fixed front-to-rear ratio for every triathlete and bicycle.
That is why some manufacturer calculators return two values rather than one. SRAM’s Zipp guidance asks for tire, rim, bike and rider information, then produces separate front and rear starting suggestions. Follow the calculator’s instructions about which weight to enter. If it asks for total system mass, include the bike and the equipment carried on race day; if it asks for rider mass, do not substitute a different quantity.
If the front and rear use different tire sizes, constructions or rims, enter those separately where the tool permits it. Do not copy the higher rear value to the front just to make both numbers match. Record each wheel’s setting and check steering and stability on a familiar ride. A calculator supplies a starting point for the stated setup; it does not replace compatibility checks or a handling test.
Marked tire width and mounted width are not always identical
A tire marked 28 mm does not necessarily measure exactly 28 mm after installation. Actual width depends in part on the rim’s internal width, tire construction and the specific model. That changes tire volume and clearance, both of which can affect pressure guidance.
Read the calculator instructions carefully. Some tools ask for the width printed on the tire, while a particular manufacturer may request measured width or offer exact tire models. Enter the value that tool asks for; do not silently substitute one measurement for another. A caliper measurement can help document the mounted setup, but it does not establish that the tire is approved for a rim.
After fitting a wider tire, check frame, fork and brake clearance through a full wheel rotation. Confirm that the tire does not rub when loaded or flexing, and follow any model-specific limits for tire width and pressure. A nominally wider tire may allow a different pressure range, but the direction and amount depend on the complete system. Do not transfer a setting from the old tire just because both sidewalls show the same maximum.
Tube, tubeless and tubular setups need different checks
A traditional clincher tire with an inner tube, a tubeless-ready tire sealed to a compatible rim, and a glued tubular tire are different constructions. They have different installation methods and failure modes, so a pressure suggestion for one setup should not be assumed to fit another.
With an inner tube, a hard impact can pinch the tube between tire and rim when pressure is too low for the load and tire volume. A tubeless setup removes the inner tube but does not remove all impact or handling risks; the tire still has to stay seated and sealed on an approved rim. A tubular tire is glued or otherwise installed according to its own instructions and should use the pressure range specified for that tire and rim.
These are general distinctions, not a pressure recipe. Tire casing, rim type, width, sealant, insert and manufacturer instructions all matter. “Tubeless” is not permission to go below a published minimum, and adding a tube does not make an unapproved hookless combination compatible. Identify the exact setup before using any chart, calculator or previous pressure note.
Convert psi, bar and kPa without changing the setting
Pressure gauges and product documents may use different units. One bar equals 100 kilopascals and approximately 14.5 pounds per square inch (psi). For unit conversion only, 3 bar is about 43.5 psi, 4 bar is about 58 psi, and 5 bar is about 72.5 psi. Those examples are arithmetic conversions, not tire-pressure recommendations.
| Bar | Approximate psi | kPa |
|---|---|---|
| 2.0 | 29.0 | 200 |
| 2.5 | 36.3 | 250 |
| 3.0 | 43.5 | 300 |
| 3.5 | 50.8 | 350 |
| 4.0 | 58.0 | 400 |
| 5.0 | 72.5 | 500 |
Keep the unit beside the number in your log. “4.0” alone could mean bar or another scale. A converted value should not be rounded upward past a component limit. If a chart gives psi and your pump shows bar, convert carefully, preserve a margin below the applicable ceiling and use the same gauge for comparisons.
Choose for the course you will ride, not a lab number alone
Triathlon courses can combine smooth closed roads, patched pavement, rough shoulders, sharp turns, wet descents and sections exposed to wind. A pressure recommendation made for an asphalt surface or one tire construction may not describe your full course. Before race week, check the course map and athlete guide, then consider whether your normal training route represents its surface and carried load.
A smooth-drum or smooth-road test can help isolate one part of tire rolling resistance, but it does not measure every vibration, cornering or handling effect found on an actual course. Use manufacturer guidance for the closest matching tire, rim and surface category, then check that the result remains inside all system limits. Test a new permitted setup on a familiar ride with safe turns and stopping points.
Do not apply an automatic “lower pressure for rain” rule. Wet-weather safety depends on tire condition, surface contamination, speed, cornering, braking and rider control as well as the tire setup. If your pressure tool asks about wet or dry conditions, use its instructions for that specific system; do not invent a fixed adjustment. When the race surface or weather is uncertain, a familiar, tested setting within the approved range is a more defensible choice than an untested last-minute change.
Separate a maximum limit from a recommended setting
A maximum printed on a component is a ceiling, not a race target. Apply the lowest relevant limit for the complete system and follow any minimum pressure or width requirements too.
For a manufacturer example, SRAM/Zipp’s current compatibility notice for its TSS hookless wheels says never to inflate the tire-and-wheel system above 5 bar (72 psi), and requires a TSS-compatible tire. That is a system-specific maximum in Zipp’s notice, not a recommendation and not a universal limit for other wheels. Use the current documentation for your exact wheel and tire models.
If a calculator suggests a value outside an allowed range, reject the suggestion and review the setup. Do not clamp a number to the boundary and assume compatibility is solved.
Gather the inputs before using a pressure calculator
Measure total supported load as the calculator requires: rider, bicycle, bottles, tools and luggage. Check whether it asks for rider mass or system mass; entering the wrong one can materially change the result.
Record tire construction, width, road surface and front/rear load assumptions. A calculator cannot inspect a damaged casing or verify whether your tire is approved on a hookless rim.
The tire-pressure calculator is a starting aid with stated limitations. Keep a note of the input values beside the output so you can reproduce the estimate after changing tires or adding race bottles.
Test a permitted range on a familiar route
Choose a safe, representative route and start within the manufacturer's guidance. Use the same gauge and similar loading each time. Compare comfort, steering, braking and whether the tire feels unstable or bottoms out over surface imperfections.
Change one variable at a time and stay within all limits. Do not chase a small speed difference from one windy ride or a different traffic pattern. Field comparisons are noisy.
If you experience rim strikes, tire squirm, unexplained air loss or uncertain bead seating, stop and inspect. More sealant or another pressure adjustment is not a substitute for diagnosing an unsafe setup.
Use a repeatable race-morning check
Inspect the tires and rims before inflating. Check valve security, visible damage and whether pressure has fallen unusually since the last ride. Use a suitable gauge and confirm whether it reads psi or bar.
Inflate to your rehearsed setting under the actual system limits, accounting for manufacturer instructions about temperature and measurement conditions. Keep the bicycle out of avoidable heat exposure and do not inflate above limits to compensate for later cooling.
If you borrow a pump, compare its reading with the gauge you normally use where practical. Small gauge differences are a reason to preserve margin, not to aim at the maximum.
Record changes that justify a new assessment
A different tire size, rim, casing, tube type, rider load or rougher course can justify reviewing the setting. A new event name alone does not. Keep a short log of system, pressure, gauge, load and handling observations.
For tubeless installation and leak diagnosis, use the tubeless setup guide. For choosing wheel depth, use the race-wheel comparison. Pressure is one part of a compatible system rather than a separate speed upgrade.
Ask a qualified mechanic when model compatibility, damage or pressure limits remain uncertain. The useful outcome is a documented safe starting range and a proven setup, not a universal PSI chart.
Build a pressure record that another mechanic could understand
Write the tire model, marked size, measured inflated width, rim model, internal width, tube or tubeless setup, and total loaded system mass. Record front and rear pressures separately with the gauge used. A note saying “80 psi worked” is incomplete without the equipment and conditions.
For unit checking, 1 bar is approximately 14.504 psi. Thus 5 bar is about 72.5 psi. This is a conversion example, not a recommended pressure. If one component states a lower permitted maximum than another, respect the stricter applicable limit and the manufacturer's compatibility instructions. Some systems also impose tire-width-specific limits.
Before testing a change, confirm that the proposed setting is inside the permitted operating range. Start on familiar ground at controlled speed. Stop if handling becomes uncertain, the tire moves abnormally or you suspect rim impacts or damage. A calculator's estimate is not permission to override a manufacturer restriction.
Keep the successful setup with your packing list. When fitting a different tire or borrowing wheels, start a new record rather than treating the old pressure as a property of your body weight alone.
Inflate a familiar, compatible system in a controlled sequence
First inspect the tire and identify the valve. A traditional Presta valve has a small tip nut that opens for inflation; a Schrader valve uses a different pump connection. Some modern valve systems have their own operating method. Use the pump head or adapter intended for the valve rather than forcing a connection that does not fit.
Place the pump securely and attach its head in the direction its instructions specify. Lever positions are not universal. If air escapes around the connection, stop and reseat it. Do not keep pumping against a blocked valve or interpret a rapidly rising hose-gauge reading as proof that air is entering the tire.
Inflate gradually while monitoring the gauge and the tire. On an installed system, inspect the seating line around both sides where visible; a bulge, uneven bead or suspected damage is a reason to stop and follow the tire and rim instructions. Initial tubeless seating can require a different procedure from routine topping up, and should not be improvised by exceeding the pressure limit.
At the intended permitted setting, disconnect as instructed without bending the valve. A brief hiss may come from the hose; it does not establish a fixed pressure change inside the tire. Do not automatically add several extra psi to compensate. Recheck consistently if the connection or reading was uncertain, then close a traditional Presta tip nut gently if applicable.
Finally, confirm both wheels are secure and perform the ordinary brake and wheel checks. Keep the pressure record separate from the mechanical inspection: a correctly inflated tire does not prove that an axle, rotor or brake is correctly fitted.
Troubleshoot a pressure change before selecting a new target
A tire that is unexpectedly soft presents a maintenance question before it presents a pressure-optimisation question. Compare the last reading, elapsed time, temperature, storage and any recent tire or valve work. Some systems lose air gradually, but a sudden change or repeated unexplained loss needs investigation.
| Observation | Useful next check |
|---|---|
| Gauge rises rapidly but tire stays soft | Pump connection, valve opening and possible blockage |
| Hissing at the valve area | Valve connection or installation, following the relevant instructions |
| One tire loses much more than its usual pattern | Inspect for puncture, damage or a sealing problem |
| Pressure changes after a wheel swap | Re-identify rim, tire, width and permitted limits |
| Ride feels different despite the same reading | Check gauge, equipment, load and road conditions |
Do not fix a worn or damaged tire by increasing pressure. Nor should you treat an automatic drop for rain, training or heat as a universal rule. The permitted system, load and conditions need to be considered together. If the setup no longer behaves predictably, get appropriate mechanical help before racing.
A pressure calculator is useful after these checks. It cannot identify damage, measure the accuracy of your pump or establish whether a tire is correctly seated. Keeping those jobs separate makes the number more meaningful.
Read the tire and rim instructions as one system
A tire sidewall and a rim manual answer related but different questions. The tire marking may describe size and a pressure limit; the rim documentation may specify compatible tire constructions, permitted widths, pressure restrictions and whether a particular tube or tubeless arrangement is allowed. Satisfying one does not automatically satisfy the other.
For an invented example, suppose a compatible tire states a maximum of 8 bar while the rim instructions limit that particular setup to 5 bar. The higher tire figure does not authorise inflating the assembled system to 8 bar. The applicable lower limit controls. Even 5 bar is a maximum in this example, not a suggested riding pressure.
Likewise, a tire that is not approved for a hookless rim does not become compatible simply because you choose a lower number. Compatibility comes before pressure selection. Check the specific model and size rather than relying on the brand or the word tubeless alone.
| Information | Where to verify it | What not to infer |
|---|---|---|
| Tire construction and size | Exact tire documentation and markings | Every size in the family has identical permissions |
| Rim construction and internal width | Exact wheel or rim manual | External rim width is the same measurement |
| Approved combinations | Manufacturer compatibility information | A tire that mounts easily is necessarily approved |
| Pressure limits | Instructions for the assembled configuration | The largest printed number is the target |
| Tube or sealant requirements | Tire, rim and relevant component instructions | Adding a tube removes a rim restriction |
If the documentation conflicts or the model cannot be identified, resolve that uncertainty with the manufacturer or a competent mechanic before riding.
Four equipment changes that deserve a fresh pressure assessment
A different tire width on the same wheel. The marked size is useful identification, but the inflated width can depend on the rim and tire. Record the actual permitted combination and measured width where the calculator requires it. Do not transfer a pressure from the old tire solely because the new package has a similar number. Check seating and clearance as well as inflation.
Borrowed race wheels. Obtain the exact wheel model, tire model, construction and relevant limits before fitting them. A familiar tire brand does not establish that a borrowed hookless or otherwise different rim accepts the same setup. Inspect brake and drivetrain compatibility separately. Pressure selection cannot compensate for a wheel that is incorrectly installed or unsuitable for the bicycle.
A different carried load. Compare the bike as ridden, including bottles, bags and supplies. A pressure estimate made from body mass alone can omit meaningful system mass. Do not assume a fixed front-to-rear distribution for every rider and position. Use the inputs requested by the relevant manufacturer or calculator and treat the result as a starting estimate inside permitted limits.
A repair or change in inflation system. Replacing a valve, changing a tube type or rebuilding a tubeless setup can change maintenance and pressure behaviour. Record what was changed and follow its instructions. Inspect the system and check its behaviour before making it the race setup. A successful pump connection is only one part of that check.
These examples are reasons to reassess, not instructions to add or subtract a universal amount. The direction and size of a suitable adjustment depend on the actual system, load and conditions.
Distinguish a useful comparison ride from a rolling-resistance test
A familiar controlled ride can tell you about comfort, predictable handling and whether the setup has an obvious problem. It cannot reliably isolate a small speed difference from wind, effort, traffic and surface variation. Do not describe one faster lap as a measured watt saving from tire pressure.
Keep the comparison simple and inside permitted limits. Record the setup and conditions, change one relevant input and use a route where you can stop safely. Avoid high-speed cornering or descending as a way to discover whether a new setting is controllable. If you notice abnormal movement, repeated impacts or uncertain handling, stop and inspect rather than continuing to collect data.
A useful result might be “this permitted setup remained comfortable and predictable on my normal route,” with a note about the conditions. That is a practical observation with limits. “This pressure is the fastest for all triathletes” is a different claim and is not supported by an ordinary ride.
If you want a more rigorous performance comparison, understand the method, equipment and repeatability required before trusting the numbers. For most readers, establishing compatibility, maintaining the system and using a consistent gauge will resolve more immediate decisions than pursuing a tiny unverified gain.
Keep a mechanic handoff concise when something remains wrong
Bring the wheel and tire identification, the recent pressure record, the gauge used and a description of the problem. Explain whether air loss occurs while stored, during riding or after a particular change. Include any suspected impact or visible damage rather than focusing only on the pressure number.
Ask what was inspected, what was changed and which instructions you should follow afterward. Keep the resulting setup details with your own record. If a different tire, valve or rim is fitted, update the limits and calculator inputs instead of continuing with an old note.
Do not let a race deadline turn an unresolved safety issue into an experiment. A familiar inspected alternative may be preferable when time is short. The purpose of the guide is to help you choose and maintain a suitable pressure within a known system, while recognising the problems that a number alone cannot solve.
Sources
Sources are listed so readers can verify consequential claims and dated details.
- Hookless tire compatibility — SRAM / Zipp (accessed September 25, 2026)
- Zipp road wheels user manual — SRAM / Zipp (accessed September 25, 2026)
- How to calculate tire pressure — SRAM / Zipp (accessed September 25, 2026)
- Know your tire pressure — SRAM / Zipp (accessed September 25, 2026)
- Road and gravel tire knowledge — Continental Tires (accessed September 25, 2026)
- Tire pressure guide — ENVE Composites (accessed September 25, 2026)
- Measuring changes in aerodynamic and rolling resistances by cycle-mounted power meters — Medicine & Science in Sports & Exercise / PubMed (accessed September 25, 2026)
Frequently asked questions
Can two pumps give different readings?
Yes. Gauge accuracy, connection losses and reading technique can differ. Use a consistent gauge and investigate a large discrepancy before riding. Do not keep adding air to chase a familiar number from a different pump, especially near a component limit.