How to Plan a Safe Cycling Route for Triathlon Training
Plan a cycling route around the session goal, traffic, surface, weather, verified stops and device navigation. Includes a practical map-checking process for triathlon training.
By Lotte
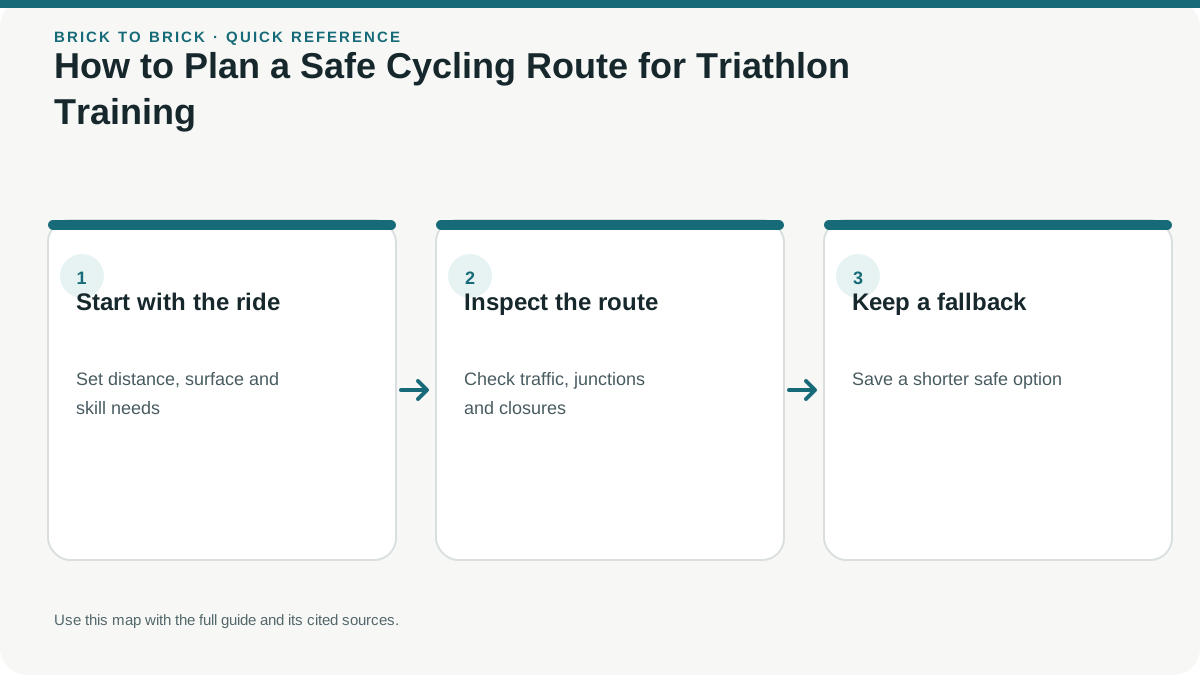
To plan a cycling route, start with the purpose and duration of the session, select roads and surfaces suited to your experience, inspect critical turns and closures, confirm useful stops, then test the route and device before relying on it. A map or popularity layer cannot certify that a road is safe or open.
Key takeaways
- 1Start with the session already prescribed, then fit a route to its purpose and duration.
- 2Check traffic exposure, surfaces, crossings, elevation shape, weather and exit options—not just distance.
- 3Route apps and heatmaps support planning but do not certify road safety, access or current conditions.
- 4Verify stops and device compatibility, test unfamiliar routes and obey signs or closures on the day.
- 5Avoid universal hydration or fueling targets; use an established, appropriate plan for your own needs.
In this article
- 1Why route planning matters more than you think
- 2What makes a good cycling route?
- 3Best apps to create cycling routes
- 4A route map is a hypothesis, not an inspection
- 5Choose a route shape that fits the session
- 6Route files, device prompts and offline navigation
- 7Test a new route before an important workout
- 8Step-by-step: how to build a route
- 9Planning water stops and toilet breaks
- 10Fueling strategy while route planning
- 11Safety and practical tips
- 12Route planning for triathlon training
- 13Common route planning mistakes
- ⚖Cycling route planning apps compared
- ?Frequently asked questions
Why route planning matters more than you think
A useful cycling route starts with the purpose of the ride, then accounts for the roads, conditions and practical needs that could affect it. That small planning step can keep an easy session easy, make a workout easier to execute and help you avoid a road or surface that does not suit your experience.
For a triathlete, the route also shapes how closely a session resembles the race. A flat, uninterrupted loop may make it easier to practise a steady effort; a technical circuit may help you learn to corner and brake in a suitable setting; a course with repeated stops can make a continuous effort difficult. The route is one part of training design, however. Follow the duration, intensity and progression set by your current training plan or coach rather than using distance or elevation to invent extra load. A route planner cannot tell you whether a workout is appropriate for your fitness or health.
Planning is also a safety check. A digital line can suggest a road, trail or turn, but current signs, closures, traffic, weather and your own comfort determine whether it is suitable when you arrive. Review crossings, surface changes, exposed sections, places to stop and ways to shorten the ride. The bike training guide explains session types; this page focuses on choosing and checking where to ride them.
What makes a good cycling route?
A good route is one you can ride safely and predictably for the session you have planned. Distance alone cannot answer that. Consider these factors together:
- Session purpose and time: Use the duration and effort from your current plan, then allow for traffic lights, stops, navigation and access to the start. A route that fits the number of kilometres but not the available time may not fit the session.
- Road and surface suitability: Check whether each segment is paved, gravel, a shared path or a road with traffic. A routing profile is an estimate, so verify unfamiliar sections with recent local information and signs. The bicycle, tire setup, handling experience and local rules all matter.
- Traffic exposure and crossings: Count difficult junctions, merges and turns across traffic, not only total kilometres. A protected path may be useful for some riders, while pedestrians, surface, access rules and busy crossings can make another path a poor fit for a sustained workout.
- Elevation and exposure: Look at the shape of the climbs and descents as well as the total gain. A steep descent, exposed ridge, tunnel, bridge or narrow shoulder may matter more than the route's headline elevation.
- Weather and escape options: Wind direction can change how exposed roads feel, but there is no universal rule to ride into a headwind first. Consider crosswinds, gusts, temperature, rain, daylight and a shorter alternative. Change or cancel a ride when conditions or local alerts make the route unsuitable.
- Stops and access: Check whether water, toilets, food and public transport are actually available when you expect to pass them. Access and opening hours vary by place and season.
Popularity data, a high route rating or a low traffic estimate is not a safety certification. Choose a route that fits your own confidence and the conditions you expect, and be willing to change it on the day.
Best apps to create cycling routes
Route-planning tools can help draw a route, inspect elevation, add waypoints and send a course to a compatible device. Their maps and features change, and availability can depend on region, account, device and subscription. Compare the task each one handles rather than treating any app as the definitive source of safe roads.
| Tool | What its official help explains | What to check yourself |
|---|---|---|
| Strava route builder | The website tool supports creating and managing routes with map-based waypoints and route preferences. Its map data is supplied by a map provider. | Availability, privacy settings, local map completeness, surface, traffic and whether the route suits your session. Community activity shows where people recorded rides; it does not prove that a road is safe or currently open. |
| komoot planner | The selected sport influences suggested paths, and waypoints can change the proposed line. Route preferences guide the planner but do not guarantee that a particular surface, climb or road type will be avoided. | Whether the selected cycling type matches your bike and intended surface; verify the actual road or path and any restrictions. |
| Ride with GPS | Its planner supports building routes and working with cues and route details. Navigation features depend on the setup and product currently available. | Confirm device compatibility, offline map access, cue behavior, surface information and current access terms. |
| Garmin Connect | Garmin documents creating courses and transferring supported course files to compatible devices. Features and steps vary by product and app version. | Check that the course imports to your exact device, that routing settings have not changed the line, and that the device has the maps and battery for the ride. |
| Google Maps | Cycling directions and bike-map details are available only in supported areas and depend on local map coverage. | Treat suggested directions as one input. Inspect intersections, access restrictions, road surface, current works and local cycling regulations. |
Official support pages are linked in the sources below. Review them for current feature details before choosing a tool; price, account access and device support can change. A second map source is useful for comparison, but agreement between two maps still does not replace local signs, road-closure notices or an on-site check.
A route map is a hypothesis, not an inspection
A clean line on a screen can hide details that matter on a bicycle. A road may be newly resurfaced, a bridge may be closed, a path may prohibit cycling, or a junction may require a difficult crossing. Map imagery and recorded rides are snapshots, and the date or accuracy of each layer can vary. Satellite imagery may show approximate width or vegetation, but it does not reliably establish pavement condition, traffic speed, access rights or whether a shoulder is usable.
For every critical segment, ask what could change the ride: Is the route open to bicycles? Does the surface match your equipment and skill? Is there a safe place to turn or stop? Are there recent closure or construction notices? A local transport agency or road authority may publish live works and restrictions. A park or trail operator can clarify access rules. A local cycling organization may help identify a known route, but its advice also needs to be checked against current conditions and your circumstances.
Use two independent map layers to notice disagreements, then investigate rather than picking the route that looks most convenient. A community heatmap is useful for discovering where people have ridden, not for measuring collision risk. Sparse heatmap data does not prove a road is unsafe, and dense data does not prove it is safe. Check the route yourself, follow the signs you encounter and be prepared to stop and choose another way. If the uncertainty is material and you cannot confirm it, omit that segment.
Choose a route shape that fits the session
Route geometry changes how easy it is to navigate, shorten a ride and repeat a section. A loop can start and finish at the same point and reduce the need to retrace a road, but a single large loop may leave few options to stop early. An out-and-back makes the return direction obvious and can be shortened at the turnaround, although wind and elevation may feel different on the way home. A figure-eight or set of linked loops can create natural exit points while keeping the rider near familiar services.
For repeated efforts, a compact circuit can reduce navigation but must have safe, legal turnarounds and enough room for other road or path users. Avoid repeatedly crossing traffic or making abrupt turns just to complete a lap. A long straight road may suit uninterrupted riding only if sightlines, traffic and local law make it appropriate; a bike path can be busy or shared, and may not permit the speeds or group behavior a workout would create.
Compare more than total distance. Look at where the route becomes isolated, how far a rider is from a usable exit, whether the finish is suitable for a transition run, and which segments are difficult to reverse. A route with several shorter loops may be more practical for a first exploration than a remote out-and-back. The right shape depends on access, the session and rider confidence, not a universal rule about which format is best.
Test a new route before an important workout
A route can look sensible on a large screen and still be awkward at riding speed. If the route is unfamiliar or includes an uncertain section, validate it on a low-stakes ride before using it for a key session. Start with the parts most likely to affect safety or continuity: complex intersections, narrow roads, surface transitions, turnarounds, climbs followed by technical descents, and any planned refill stop.
During the test, note whether cues arrive early enough, whether the surface matches the map, how traffic behaves at the time of day you expect to ride and whether there is a safe place to stop. Check the real travel time rather than assuming the map’s estimate matches your pace. If a stop is closed, record a confirmed alternative. If the route requires repeated phone checks, too many tight turns or an unsafe crossing, edit it or find another route.
The test does not certify future conditions. Roadworks, weather, events and seasonal access can change after you ride it. Recheck official notices before departure and use the route only when it still makes sense. Save a corrected version with a clear name and date, and keep a short fallback route available. Never continue through a closure or follow a navigation prompt that conflicts with signs, a marshal, law enforcement or immediate conditions.
Step-by-step: how to build a route
Use a repeatable process, then adapt it to the ride and the place:
- Start with the session already assigned. Note its intended duration, effort, terrain or handling focus from your training plan or coach. Do not add distance, intensity or climbing just because a route builder makes it easy.
- Choose a suitable start and shape. A loop returns to the start; an out-and-back is easy to shorten; linked loops create earlier exit points; a short circuit makes repeated efforts easier to locate. Consider safe parking, transit, a direct ride from home and how you will finish.
- Draw the route on a current map. Add waypoints at important junctions and places where a routing engine might send you onto a path, private road or unsuitable surface. Select the closest available activity type and inspect the proposed line instead of accepting it automatically.
- Review the profile and every critical segment. Check steep descents, road crossings, bridges, tunnels, narrow sections, unpaved links and exposed locations. Confirm uncertain segments through current local authority notices, a cycling organization, recent reliable reports or a low-stakes visit.
- Plan the practical stops. Verify opening times, public access, refill opportunities, toilets and transport rather than assuming a symbol on the map is available. Pick a backup if a stop is closed or the route must change.
- Check forecast and local alerts close to departure. Review wind including gusts and crosswinds, rain, temperature, daylight and any warnings. Keep an alternative route that reduces the specific exposure you are concerned about; a shorter line is not automatically safer.
- Save and test the course. Export or sync in a format your device supports, compare the device preview with the intended route and check battery, map downloads and cue settings. Try a short segment or easy ride before relying on unfamiliar navigation during an important workout.
- Reassess on the day. Road signs, barriers and police or event instructions take precedence over the file. If a segment is closed or unsafe, stop somewhere appropriate and reroute or turn back. Do not try to recover a planned training metric by taking a risk.
Planning water stops and toilet breaks
Think through water, toilets and other stops before a ride that will take you beyond familiar streets. The useful plan depends on the expected duration, climate, your individual needs, the ability to carry supplies and what is genuinely accessible along the route. There is no universal refill interval that works for every rider or day.
Inspect each planned stop for opening hours, seasonal closures, public access, payment requirements and whether it is on the route or requires a detour. A map icon or business listing can be out of date. Parks may lock facilities, cafés may be closed, and a place that sells water may not allow use of a restroom. If a stop is important, confirm it with a current source or choose a backup location.
Carry what you reasonably need until the next confirmed option, plus a contingency that fits the route and conditions. On a remote ride, a longer gap between services changes the amount of water and repair equipment you can carry and may be a reason to pick a different route. A phone battery or mobile signal is not guaranteed everywhere. Save the route offline if the device supports it, note a way back to populated areas and know how to contact local assistance.
Hydration needs vary with the athlete and conditions. Use a plan already familiar to you, and get individualized guidance if a health condition or medication affects fluid needs. This page does not prescribe a volume or drinking schedule. For general fueling choices, see the triathlon race-fueling guide; follow your own established plan and make sure any intended products or refill points will actually be available.
Fueling strategy while route planning
Route planning can make an existing fueling plan easier to follow, but it should not create a new intake target. The amount and timing an athlete tolerates can vary with duration, intensity, body size, conditions, gastrointestinal response, training history and health. A route guide cannot set a universal grams-per-hour target or decide which products are appropriate.
Before a longer session, check how long you expect to be away, what you can carry securely, where a planned stop is confirmed, and what you will do if it is closed. Put products where you can reach them without unsafe handling, and do not plan a stop or eating task that encourages looking away from traffic. Practise any race-day strategy during training only in a way that fits advice from a qualified sports dietitian or clinician when individual needs or medical risks matter.
If an athlete has not established a fueling approach, use a qualified professional or a reputable, appropriately scoped resource rather than copying a fixed rule from a route map. Keep route logistics separate from nutrition prescription: the map can show a shop, but it cannot confirm stock, opening hours, dietary suitability or that a product is safe for you. Carry a practical fallback and adjust the route if the plan depends on a service you cannot verify.
Safety and practical tips
A route file does not make a ride safe. Before leaving, check that the bicycle is functioning, you can carry a charged phone and basic repair items suited to your setup, and you know what to do if you cannot continue. Wear a properly fitted helmet where appropriate and follow the equipment and road rules that apply locally. Lighting and reflective equipment should match the law, visibility and time of day. The U.S. National Highway Traffic Safety Administration recommends choosing routes with less traffic and slower speeds and highlights visibility, attention and following road rules; use your local authority for rules in another country.
Choose roads and paths based on your own experience and the specific conditions. Avoid a segment that feels beyond your handling ability, especially when it combines fast traffic, limited sightlines, poor surface or difficult weather. Do not assume a road is safe because cyclists appear on a heatmap or because a route has been used before. Obey signs and temporary restrictions, yield as required, communicate predictably and do not interact with a screen while riding.
Check weather shortly before setting off and again if conditions can change during a long session. Thunderstorm, flood, wildfire, heat, wind and other alerts may require shortening, postponing or cancelling the ride. Strong side gusts can be difficult to manage, particularly on an exposed road or with deep wheels. Make a decision based on the local forecast and your experience rather than forcing a preset direction or distance.
For a solo ride, consider telling a trusted person the approximate route and expected return time. Share live location only if you want to, understand who can see it, and know how to stop sharing. Keep personal information out of public route titles and activity descriptions if privacy matters. Tell your contact what to do if you are overdue, and remember that phone service and battery may fail.
Route planning for triathlon training
Match route features to the purpose of a planned session without assuming that one route suits every triathlete. For a steady ride, a familiar loop with fewer complicated turns may reduce navigation interruptions. For hill practice, choose climbs and descents appropriate to current handling skill and traffic conditions; the elevation number alone does not show road width, gradient, braking demands or safe sightlines. To practise a race course, use the event’s official course information and local rules, but do not force an exact replica if a safe equivalent is not available.
For an interval session, consider whether the route has safe, legal places to begin and end efforts without blocking traffic or creating a sudden speed change. A closed circuit or suitable path may reduce junctions, but check access rules, pedestrians and surface. Stop or modify the workout if the route is busier or more technical than expected. The route should support the session; it should not encourage unsafe power targets or riding through a red light.
For a brick workout, decide where you can change shoes, secure a bicycle and start the run without an unsafe crossing or an awkward roadside stop. A loop ending at home or a suitable facility can make the transition practical. A recovery ride can use an easy-to-navigate route with convenient turn-back points, but its effort should still follow the training plan. If training with a group, agree on route, regroup locations, signals, pace and local drafting rules before departure. The bike-training guide covers session goals; this route page covers how to check the riding environment.
Common route planning mistakes
These are frequent planning errors and the check that can prevent each one:
- Treating a heatmap as a safety rating. Popularity data shows recorded activity, which may be old, incomplete or concentrated among experienced riders. It does not establish current safety, legal access or surface condition. Inspect the road and compare with local sources.
- Assuming the map line is ground truth. Maps can omit closures, private access, new crossings or surface changes. Verify critical sections and follow signs when they differ from the plan.
- Planning a stop that is only a symbol. Confirm current opening hours, public access, refill and toilet availability, and save a backup.
- Building too many turns into a key workout. Complex navigation can interrupt focus and increase screen interaction. Prefer a route you have checked and that suits the session.
- Making the route harder than the training plan. Extra distance or climbing is still extra training load. Choose the assigned session first and adjust the route to fit.
- Having no exit or return option. Use a loop, linked loops, transport option or other realistic shortcut where available; a file cannot guarantee that transport will accept a bicycle.
- Trusting an imported course without checking it. Compare the map and device preview, verify supported file type and navigation behavior, and test before an important ride.
- Sharing route details without considering privacy. Publicly visible start points can reveal home or routine. Review audience and location settings before publishing an activity.
Keep a note of closures, confusing turns and useful stops after the ride. A small edit based on first-hand route observation makes the next version more useful; it does not mean the same conditions will remain next week.
Cycling route planning apps compared
| App | Best For | Surface Data | Navigation | Price | Device Sync |
|---|---|---|---|---|---|
| Strava | Finding popular roads | No | Basic | Subscription | Garmin, Wahoo |
| Komoot | Detailed planning | Yes | Turn-by-turn | One-time purchase | All major devices |
| Ride with GPS | Advanced riders | Limited | Turn-by-turn | Subscription | All major devices |
| Garmin Connect | Garmin owners | No | Turn-by-turn | Free | Garmin only |
| Google Maps | Quick distance checks | No | Car-focused | Free | None |
Recommended gear
Affiliate disclosure: Brick to Brick may earn a commission from qualifying purchases, at no extra cost to you. Read our full affiliate disclosure. Unless a named method says otherwise, these are research-based recommendations rather than first-hand product tests.
Garmin Edge 540
GPS bike computer with maps, navigation, and training metrics. Best for route following and performance tracking.
View on AmazonWahoo ELEMNT BOLT V2
Streamlined bike computer with automatic route sync and excellent navigation. Perfect for triathletes who want simplicity.
View on AmazonQuad Lock Phone Mount
Secure phone mount for using route apps on your handlebars. Great for riders who prefer phone-based navigation.
View on AmazonSources
Sources are listed so readers can verify consequential claims and dated details.
- Bicycle Safety — National Highway Traffic Safety Administration (accessed September 25, 2026)
- Temporary Road Closures — Adventure Cycling Association (accessed September 25, 2026)
- How Do I Create and Manage Routes on the Strava Website? — Strava Support (accessed September 25, 2026)
- Plan routes on the website — komoot Support (accessed September 25, 2026)
- Route Planning 101 — Ride with GPS Support (accessed September 25, 2026)
- Creating a Course — Garmin Support (accessed September 25, 2026)
- Importing Third-Party Courses — Garmin Support (accessed September 25, 2026)
- Get directions and show routes — Google Maps Help (accessed September 25, 2026)
Frequently asked questions
What is the safest way to plan a cycling route?
Start with your planned session, then review traffic, crossings, surface, access, weather and escape options using current local information. No map or popularity layer certifies that a route is safe.
Can I use a cycling heatmap to choose a safe road?
A heatmap can reveal where people have recorded rides, but it measures activity rather than safety or current road conditions. Use it as a discovery aid and verify the road independently.
Should I plan a loop or an out-and-back ride?
Either can work. A loop returns to the start; an out-and-back is easy to shorten; linked loops can offer exit points. Choose based on access, navigation, conditions and the workout.
How do I know whether a route is suitable for my bike?
Check the actual surface, access rules, gradients and technical sections against your bicycle setup and handling experience. Verify unfamiliar or consequential sections with recent local information.
How often should I plan water stops?
There is no single interval suitable for every athlete, climate and ride. Plan around expected duration, individual needs, what you can carry and confirmed access to refill points; use qualified advice when health factors affect hydration.
Can I follow a route file without mobile signal?
Some devices and apps support downloaded maps or offline courses, but capability varies. Confirm your model, save the area in advance, charge the device and carry a reasonable backup.
Do I need to test a new cycling route first?
Testing an unfamiliar route on an easy, low-stakes ride can reveal confusing turns, unsuitable surfaces and closed stops. Recheck current conditions before later rides because roads and access can change.