How to Pack a Triathlon Bike: Protection and Reassembly
Pack and travel with a triathlon bike by checking airline and battery rules, protecting parts, recording fit and safely reassembling before race day.
By Lotte
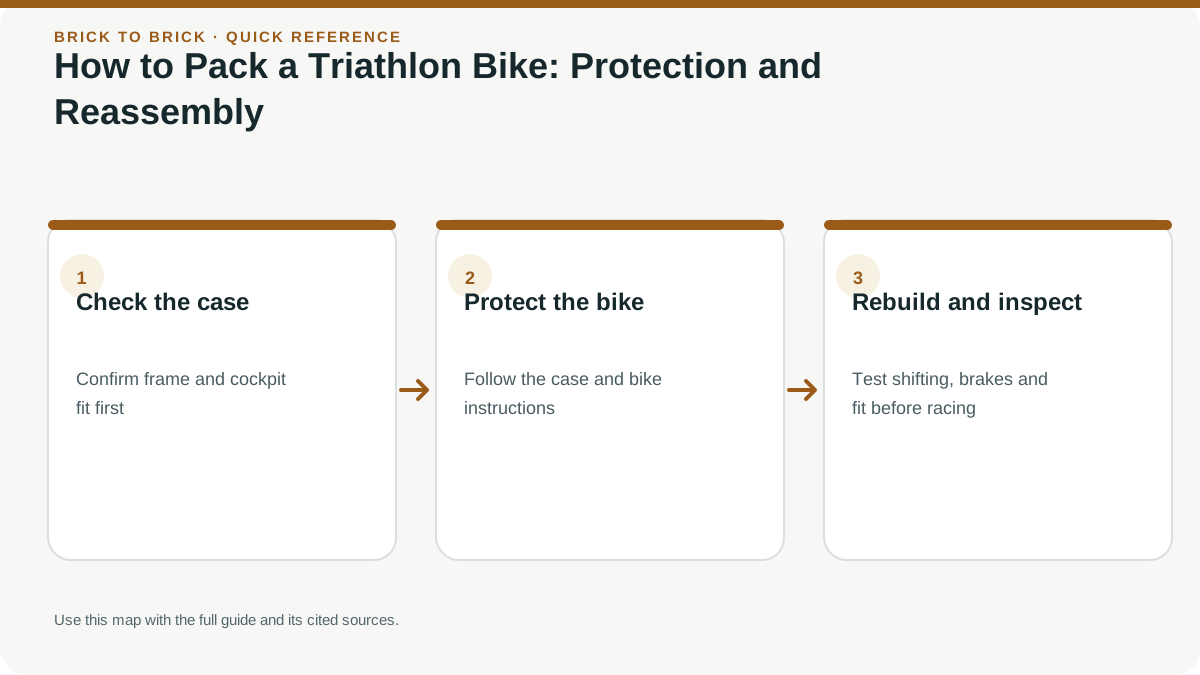
Pack a triathlon bike to the bicycle and case makers’ instructions. Record fit settings, protect removed parts, check airline and battery rules for every flight segment, and inspect the bike before riding.
Key takeaways
- 1Airline size, fee and packaging rules differ; verify the operating carrier’s current policy.
- 2Battery transport depends on the device, battery and carrier requirements.
- 3Do not ride after reassembly until steering, brakes, wheels and shifting are checked.
In this article
- 1Check the bike-and-case combination before dismantling
- 2Create a fit record and parts inventory
- 3Protect the frame, fork and braking system
- 4Secure wheels, small parts and loose accessories
- 5Reassemble with an inspection sequence
- 6Complete a short functional ride before race check-in
- 7Make a labelled reassembly inventory
- 8Prepare a tool list from the actual disassembly
- 9Choose a packing method that matches the bike and your tools
- 10Check airline baggage and battery rules before packing
- 11Photograph the bicycle and label every removed part
- 12Protect delicate parts without putting pressure on the frame
- 13Prepare wheels, tires and cockpit for travel
- 14Reassemble in a clean space and complete a safety check
- 15Plan arrival, storage and a backup route
- 16Confirm airline, battery and destination rules early
- 17Keep a race-ready fallback if the case or bike is delayed
- ?Frequently asked questions
Check the bike-and-case combination before dismantling
Integrated cockpits, hydraulic hoses, internal wiring, unusual seatposts and frame-specific storage can make a generic packing checklist unsuitable. Confirm that your frame size, handlebar width and wheel arrangement fit the case.
Read the case instructions and the current bicycle manual together. If the case requires a procedure you cannot complete confidently, ask a mechanic or choose another transport system. Do not disconnect hydraulic hoses or force a cockpit sideways simply to close a lid.
For baggage rules and booking, use flying with a triathlon bike. This page stays focused on the mechanical job and the inspection that makes the bike rideable afterward.
Create a fit record and parts inventory
Photograph the bicycle from both sides and above the cockpit. Record saddle height using a repeatable reference, seatpost insertion, saddle position, pad spacing and extension reach where relevant. A tape mark is helpful, but a photograph and measurement provide a backup if the tape moves.
Make a list of each part removed and the tool needed to reinstall it. Keep bolts, washers, spacers and axles together in labelled bags. Note the orientation of asymmetric parts.
Find the manufacturer’s torque specification for each disturbed fastener. There is no single safe torque for every stem, seatpost, derailleur or pedal; values from an unrelated bike are not substitutes.
Protect the frame, fork and braking system
Follow the case's supports and restraint locations so the bicycle cannot move freely. Keep hard objects from pressing into carbon tubes. Pad contact points without creating new concentrated pressure where a strap tightens.
For disc brakes, use appropriate transport spacers when wheels are removed and avoid pulling a brake lever against unsupported pistons. Protect rotors from bending using the transport method recommended for the wheel and case. Keep lubricants away from braking surfaces.
Support the drivetrain as instructed rather than leaving vulnerable parts to carry the package's load. Some systems require removing a derailleur; others protect it in place. Follow the specific instructions instead of treating removal as universal.
Secure wheels, small parts and loose accessories
Use the intended wheel compartments, covers and axle protection. Check that a hub or cassette cannot contact the frame through thin padding. Secure pumps, tools and removed accessories so they cannot become moving hard objects inside the case.
Do a gentle movement check before closing. Nothing should rattle freely, pinch a hose or bend a cable sharply. Stop if the lid requires force; more compression is not proof of a secure fit.
Take photographs of the packed layers. They help you reproduce the arrangement for the return journey and document the condition before transport. Add identification without exposing more personal information than the carrier requires.
Reassemble with an inspection sequence
Open the case in a clean, well-lit area and check the inventory. Inspect frame, fork, wheels, cockpit and drivetrain for visible damage before installing parts. Suspected cracks, distorted parts or damaged hoses need qualified assessment before riding.
Reinstall components in the order required by the manufacturer, using the proper tools and torque values. Confirm minimum insertion markings, steering alignment, wheel retention and brake operation. Match fit measurements rather than guessing from memory.
Shift through the gears in a safe supported position. Check that the chain runs correctly and controls work without pulling on cables or hoses. If electronic components were removed, reconnect and pair them as instructed.
Complete a short functional ride before race check-in
Start in a safe area at low speed. Test both brakes, steering and shifting before increasing effort. Listen for movement or noise and stop to inspect anything unusual. Do not use a fast descent as the first test.
Check the fit again after the ride and inspect any disturbed fasteners according to the manufacturer's instructions. If a problem remains, leave time for a mechanic; an expo repair service is not guaranteed to have every proprietary part.
Save the packing photographs and inventory for the return trip. The process is complete when the bike is safely reassembled and checked, not when the case reaches the hotel.
Make a labelled reassembly inventory
Photograph each stage before removing the next component. Store parts in labelled bags that identify their location, not just their appearance: front axle, rear axle, pedal washers or a particular spacer. Keep the manufacturer's torque instructions with the relevant component record; a remembered number from a different stem is not transferable.
A useful inventory includes the tool required at the destination. A multitool may not reach a recessed bolt, and a short wrench may not operate a tightly fitted pedal. Check the tool against the actual bike before packing. If the bag design requires work you cannot perform confidently, arrange a qualified mechanic rather than learning during race check-in.
For hydraulic disc brakes, follow the manufacturer's instructions for transport spacers when wheels are removed. After reassembly, check wheel retention, steering, brakes, tire seating and shifting before the short ride. Recheck items disturbed during packing after that ride. Take photographs of final setup as well as disassembly: they help distinguish travel damage from a part that was already marked.
Prepare a tool list from the actual disassembly
Lay out each tool as you use it at home, then compare that set with what will be available at the destination. Check reach and fit as well as nominal size. An awkwardly positioned bolt may require a tool shape your compact multitool cannot provide.
Keep small parts organised and avoid placing heavy tools where they can move against the frame in transit. Follow baggage rules for the tools and other equipment you carry. If a task requires a torque wrench or specialist knowledge, arrange access before departure. A photograph of the assembly is helpful, but it cannot supply the correct installation procedure or replace a missing tool.
Choose a packing method that matches the bike and your tools
Bike cases differ in what they protect and how much disassembly they require. Hard cases can shield the frame from some impacts but are bulky and heavy. Soft cases may weigh less and fold for storage, but protection depends on internal supports and careful packing. Neither type prevents every baggage-handling incident.
Before choosing, compare the case’s internal dimensions with your actual bicycle, wheel size, cockpit, brakes, seatpost and integrated cables. Confirm whether the bike fits without cutting or forcing parts, and check the case manufacturer’s list of compatible configurations. Measure the packed exterior and weight because airlines set baggage allowances and excess-fee rules that vary by route and ticket.
Choose a case you can lift, transport and store at the destination. Ask whether you can assemble the bike with the tools you own or need a mechanic. If a carbon frame, proprietary cockpit or hydraulic brake system requires specialist handling, factor in professional packing and reassembly rather than relying on a generic video.
Check airline baggage and battery rules before packing
Airlines set their own size, weight, packaging, fee and acceptance rules for bicycles. The policy can differ by airline, fare, route, aircraft and operating carrier. Check the exact itinerary and confirm whether the case counts as sports equipment, oversize baggage or a standard checked bag. Save the written policy and any confirmation from the airline.
Remove prohibited or restricted items from the case. Lithium batteries in lights, computers, power meters or electronic shifting systems may be subject to aviation rules, and spare batteries may need to travel in carry-on baggage with protected terminals. The U.S. Federal Aviation Administration’s PackSafe guidance applies to U.S. aviation; other jurisdictions have their own authority. Follow the airline and relevant aviation rules for the trip.
Do not pack CO2 cartridges, tools, liquids or bike batteries based on guesswork. Check the airline, airport security and destination rules for each item. If a device’s battery cannot be removed or its rating is unclear, ask the manufacturer and airline before travel. Restrictions can change, and acceptance at one airport does not guarantee acceptance on the return flight.
Photograph the bicycle and label every removed part
Clean the bike and take photographs from both sides, including the cockpit, spacers, seatpost height, saddle angle, brake routing, wheel orientation and drivetrain. Photograph each stage as you remove parts. These pictures help identify the original setup; they do not replace torque specifications or a mechanic’s inspection.
Use labelled bags for bolts, spacers, axles, pedals, derailleur hanger or other removed pieces. Record which bag belongs to which component and keep small parts in a case pocket that closes securely. Mark the seatpost insertion point with a removable reference where the manufacturer permits. Do not scratch or cut carbon to create a mark.
Create a reassembly checklist that includes torque values from each component maker, brake alignment, shifting, tire seating and wheel retention. A torque wrench may be necessary for some fasteners. If you do not have the right tools or confidence, arrange a shop appointment at the destination before you travel.
Protect delicate parts without putting pressure on the frame
Follow the case instructions for frame supports, fork blocks, axles and wheel compartments. Protect the fork and dropouts using the intended spacers; do not clamp the case onto a carbon tube unless the manufacturer specifies that point. Prevent the frame from moving, but avoid crushing foam against thin tubes, hoses or cables.
Remove pedals, handlebars, derailleur or seatpost only as the case and bike makers permit. Support a removed rear derailleur so it cannot strike the frame. Protect brake levers, rotors and hoses from bending. A rotor cover can help protect the disc from impact and contamination; keep oily products away from braking surfaces.
Use padding to separate hard objects and keep tools from moving. Do not leave a pump, multitool or axle loose beside the frame. Close the case carefully and check that no cable or fabric is trapped at the seam. If the bike shifts when the case is lifted gently, reopen and secure it rather than adding pressure by overtightening straps.
Prepare wheels, tires and cockpit for travel
Remove wheels as required by the case and protect rotors, cassettes and axles from impact. For tubeless tires, follow the wheel and tire maker’s travel guidance; pressure and sealant behavior can change with temperature and handling. Do not assume a tire should be fully deflated or inflated for every case. Check the relevant component instructions.
If the cockpit is integrated, confirm how it can be moved without twisting hydraulic hoses or electrical wires. Mark spacer order and orientation. Do not rotate bars beyond cable range or disconnect a hydraulic line unless you have the tools and knowledge to bleed it. Some proprietary systems require professional service.
Pack a small, legal reassembly toolkit separately if airline rules permit. Include only tools you know how to use and any necessary adapters. Do not place restricted batteries or pressurized cartridges in checked baggage without verifying the applicable rules. Keep race-critical items such as helmet and shoes protected in appropriate luggage if allowed.
Reassemble in a clean space and complete a safety check
Unpack the bike in a well-lit area with room to lay out parts. Check the frame, fork, wheels, cockpit and drivetrain for visible cracks, dents, bent rotors or other damage before assembly. If you suspect structural damage, do not ride; contact the manufacturer or a qualified mechanic.
Reinstall parts using the maker’s sequence and torque values. Confirm the wheels are securely retained, brakes work, shifting is correct and the handlebars move freely without pulling hoses. Spin each wheel and check for rubbing. Test the bike at walking speed first, then ride a short, quiet loop before increasing effort. Do not use a fast descent or race course as the first functional test.
If hydraulic brakes feel soft, a rotor is bent, a tire bead looks uneven or steering is not smooth, stop and address it. A shop inspection is sensible after significant transit damage or when assembly involves unfamiliar proprietary parts. Ask the race mechanic about availability and opening hours before travel, not after discovering a problem.
Plan arrival, storage and a backup route
Build time into the trip for delayed baggage, unpacking, reassembly and an inspection ride. Check the destination’s bike-friendly transport, hotel storage policy, assembly space, pump access and nearest service shop. Confirm that the case can be stored safely after check-in; some races have a designated bag service and others do not.
Keep photos, airline policy, case instructions, serial numbers and emergency contact information available offline. Photograph the packed case before check-in and keep baggage receipts. If the case is delayed, ask the airline about tracing and delivery, then contact the race organizer about check-in deadlines and local rentals. Do not assume a late arrival will qualify for an exception.
A folding bike, rental bike or shipping service may be more practical for a specific trip. Compare total costs, assembly risk, course familiarity and event logistics. For connected planning, see flying with a triathlon bike, the race-day packing list and pre-race equipment checks.
Confirm airline, battery and destination rules early
Bike baggage is governed by the airline and route, not by a universal sports-travel allowance. Check the operating carrier’s current size, weight, fee, packaging and booking rules for every flight segment. A codeshare may be operated by a different airline with different limits. Ask whether a hard case is required, whether the bicycle counts as a standard checked bag or special equipment, and whether there are seasonal or aircraft restrictions. Keep the confirmation with the booking.
Electronic shifting batteries, lights, power meters and other rechargeable devices may fall under dangerous-goods rules. Battery placement, spare battery limits and whether a device can travel in checked or carry-on baggage depend on the airline and current aviation rules. Do not pack a loose battery without checking its specifications and required protection. Remove or secure devices according to manufacturer guidance, and protect terminals from short circuit. Contact the airline when the rule is unclear; do not assume that another carrier’s answer applies.
Check customs, import or temporary-admission requirements if crossing borders with an expensive bicycle or spare parts. Bring proof of ownership, serial numbers and travel insurance details. If using a courier or shipping case ahead, verify delivery timing, customs paperwork, insurance exclusions and who can receive the box. A race venue may not accept deliveries before a certain date.
Photograph the bicycle before packing, including serial number and component condition. Keep airline tags and receipts until the bicycle is safely retrieved. If the case arrives damaged, report it before leaving the baggage area and follow the carrier’s claim process. These steps do not guarantee compensation, but they create a clear record. For battery details, follow the current airline page and official aviation guidance rather than an old packing checklist.
Keep a race-ready fallback if the case or bike is delayed
Build a contingency around the possibility that the bicycle arrives late, damaged or with a missing part. Carry essential small items that are permitted in cabin baggage, such as cleats, pedals or tools only if airline rules allow them. Keep prescriptions, race documents, clothing, nutrition products and any critical personal items accessible rather than inside the bike case. Confirm local bike-shop hours, rental options and event deadlines before departure.
Write down the bicycle’s fit measurements and take photographs before disassembly. Include saddle height, saddle setback, handlebar position, spacer arrangement and cockpit angle. Pack bolts and small hardware in labeled bags, and keep the right tools with the parts. If the bike is assembled by a shop at the destination, send the measurements and setup notes in advance. Ask whether the shop has experience with the specific frame, brakes and electronic system.
Allow enough time after arrival to assemble, inspect and complete a short safe ride. If the case is delayed, do not ride a bicycle with questionable brakes, steering, wheels, tires or torque-critical parts simply to meet the schedule. Ask a qualified mechanic to inspect it. Follow manufacturer torque instructions; over-tightening or under-tightening carbon components can cause damage or injury. If the bike cannot be made safe, contact the event about options.
Travel adds fatigue and can change sleep, meals and hydration. Keep the first ride easy and use it to check shifting, braking, wheel security and handling rather than adding a hard workout. Plan a route away from traffic where practical. For related logistics, review race-week planning, bike maintenance basics and traveling with race nutrition. A reliable backup plan reduces pressure to make unsafe last-minute decisions.
Sources
Sources are listed so readers can verify consequential claims and dated details.
- Bike manuals and technical support — Canyon (accessed September 13, 2026)
- Bike bag instructions and support — Scicon Sports (accessed September 13, 2026)
- FAA PackSafe baggage guidance — Federal Aviation Administration (accessed September 24, 2026)
- Passenger baggage rules — International Air Transport Association (accessed September 24, 2026)
- Lithium battery guidance — Federal Aviation Administration (accessed September 24, 2026)
Frequently asked questions
Can I check my bike case on any airline?
No. Size, weight, fee, booking and aircraft limits vary by carrier and route. Confirm with each operating airline before travel.
Can electronic shifting batteries go in checked baggage?
Requirements depend on the battery and airline. Check current carrier and aviation rules for installed and spare batteries before packing.