Is a Bike Fit Worth It? Evidence, Costs and When to Book
Learn what a bike fitting can assess, when it may be useful, how to compare services, and how to test a position safely without expecting guaranteed speed or injury outcomes.
By Lotte
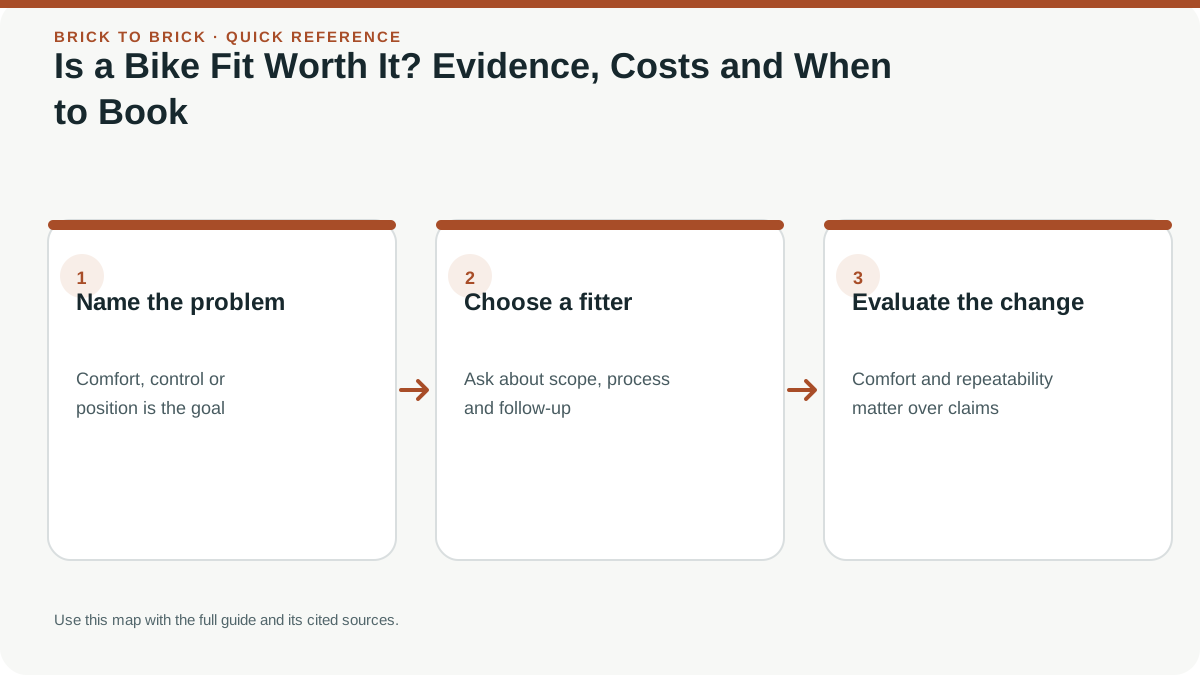
A bike fit may be worthwhile when you need help choosing a frame, setting up triathlon extensions, or investigating a repeatable comfort or control problem. It cannot guarantee speed gains, prevent every injury or diagnose pain. Compare the service process, follow-up and your specific question before paying.
Key takeaways
- 1A fit can assess contact points and position for a particular rider, bicycle and goal; the result is individual.
- 2Research does not justify a guaranteed percentage power increase, number of minutes saved or injury-prevention promise.
- 3Pain is not a diagnosis of saddle height or cleat position; seek clinical assessment when symptoms are concerning.
- 4Compare appointment scope, equipment, documentation and follow-up instead of relying on a global price list or technology label.
- 5Test setup changes progressively in safe conditions and keep a record that lets you reverse a poor change.
In this article
- 1Why bike fitting matters for triathletes
- 2What is a bike fit?
- 3Benefits of a proper bike fit
- 4Is a bike fitting worth it? Decision by athlete level
- 5How to choose a bike fitter
- 6Prepare for a fitting appointment
- 7Test position changes over more than a few pedal strokes
- 8Signs you need a bike fit
- 9Cost and value: what to compare
- 10DIY bike fit vs professional fit
- 11How to choose the right bike: beginner to advanced
- 12Common bike fit mistakes
- 13Practical bike setup checklist
- 14Choosing the right fit for your climate and terrain
- ⚖DIY Fit vs Professional Fit Comparison
- ?Frequently asked questions
Why bike fitting matters for triathletes
A bike fit is the process of setting up a bicycle so its size, contact points and riding position suit a particular rider and intended use. For a triathlete, that can include the saddle, pedals and cleats, handlebar reach, brake access and, on a time-trial or triathlon bike, the arm pads and extensions. A comfortable road-bike position and an aerodynamic position are related decisions, but they are not interchangeable goals.
The amount of time spent on the bike makes repeatable comfort and control important. However, a fit cannot make an unsuitable frame safe, guarantee extra speed, prevent every injury or replace practice. Position changes can affect joint angles, muscle activity and aerodynamic posture, but an individual result depends on the rider, equipment, protocol and task. A rider who is uncomfortable, cannot control the bicycle or cannot sustain the position can use that information to decide whether to seek a qualified fitter.
If pain is persistent, worsening, severe or present away from cycling, do not assume a bike adjustment is the cause or the treatment. Stop or modify the activity and seek appropriate clinical advice when symptoms warrant it. This guide explains the purchasing and setup decision; it does not diagnose a condition. For an overview of the fitting process, see the beginner bike-fit guide.
What is a bike fit?
A bike fit is an assessment and adjustment of the interaction between rider and bicycle. It usually begins with a conversation about the bike, riding history, goals, comfort and any constraints. The fitter may observe pedalling, inspect equipment and change one or more contact points. The exact process differs: not every service uses motion capture, pressure mapping or the same measurements, and buying more technology does not by itself prove that the result is better.
The main contact areas are:
- Saddle and pelvis: height, fore-and-aft position, tilt and saddle shape can change reach to the pedals and pressure at the contact point.
- Feet and pedals: cleat placement, rotation and float affect how the shoe meets the pedal. There is no single cleat angle that is right for every anatomy or shoe.
- Hands and torso: handlebar reach, height and width affect support, steering, braking access and the amount of forward lean.
- Triathlon extensions: pad position, extension length and angle, and hand position must work with steering control and the rider’s ability to sustain the posture.
- Frame and components: the frame’s stack, reach and adjustment range constrain what positions can be achieved. A fitter may conclude that a different frame or component is needed rather than force a position onto an unsuitable setup.
A measurement is evidence about a position, not an automatic verdict. A fitting is more useful when its observations are connected to the rider’s goals and then checked on the road or trainer in a realistic, controlled way.
Benefits of a proper bike fit
A well-run fitting can help identify a position that the rider can control and sustain, document the setup, and explore whether a contact-point or component change improves comfort for the intended ride. It can also clarify whether the current frame has enough adjustment range for a road, endurance or triathlon position.
It is not possible to promise a standard percentage increase in power or a number of minutes saved. A 2024 systematic review of cycling-position research found that changes can influence biomechanical and physiological measures, while results depend on which variable is changed and how the outcome is tested. A laboratory position that lowers aerodynamic drag may be less useful if the rider cannot hold it, breathe comfortably, see the road or control the bike. A fitting also cannot guarantee an injury-free season or establish the cause of knee, back, neck or saddle pain.
For triathlon, consider the whole sequence: can you hold the position during the intended bike effort, shift and brake safely, then begin the run without a new problem? That is a question to test progressively, not a benefit every fitter can guarantee. For saddle-specific shapes and pressure considerations, use the triathlon saddle guide; for extension choices, see the tri-bars guide.
Is a bike fitting worth it? Decision by athlete level
A fit is worth considering when it can answer a clear question or solve a repeatable setup problem. Training age alone is a weak reason to buy a particular tier of service.
New rider or new bicycle: Start with correct frame sizing, safe brake access and a basic adjustment. Ask the retailer what setup is included in the purchase and whether it is a brief sizing check or a documented fitting. A roadworthy bike that fits within its adjustment range matters more than a premium label.
Rider building longer sessions: Consider a fit if the same discomfort returns, you cannot comfortably reach controls, or you are uncertain how a new saddle, cleat or cockpit adjustment affects the whole position. A short follow-up after you have ridden the setup may be more useful than an expensive package of measurements without a chance to retest.
Triathlete considering aero bars or a triathlon bike: The position has to balance aerodynamics with visibility, steering, braking, breathing and sustainable power. A fitter who understands the intended event and equipment can assess those trade-offs and flag limits in the frame’s adjustment range.
Rider with persistent pain or medical complexity: A fitter can review the bicycle setup, but should not diagnose an injury or promise treatment. A clinician familiar with the symptoms may need to assess them, and the fitter and clinician can coordinate when appropriate.
If the current position is comfortable, controllable and suitable for the riding you do, there may be no urgent reason to pay for a full refit. Ask what decision the service will help you make before booking.
How to choose a bike fitter
There is no single worldwide certification that makes every bike fit service equivalent. Ask how the fitter learned the work, how often they fit the type of bicycle you use, and what they do when the frame or the rider’s goals do not allow a comfortable position. If a health problem is involved, ask whether they work with an appropriately qualified clinician and where their scope ends.
Look for a process that begins with questions, explains why a change is being considered and gives you a chance to test the outcome. Ask whether the appointment uses your bicycle and shoes, includes cleat and tri-bar setup if needed, records the original and final measurements, and includes a follow-up. Ask what happens if the position feels worse on the road or a component must be replaced. A fitter should be able to say that no adjustment is needed or that a different frame is the practical answer.
Be cautious of guaranteed time savings, universal power gains, claims that an adjustment will cure a medical condition, or pressure to buy expensive parts without explaining the fit constraint. Technology can help measure a rider, but a clear rationale and safe retest matter more than a promise. If the answer to your question remains vague, compare another provider before paying.
Prepare for a fitting appointment
A useful appointment starts with useful context. Bring the bicycle in the condition you ride it, current cycling shoes and cleats, helmet, usual clothing and any accessories that change your position. If you plan to use triathlon extensions, bring them or confirm that the shop has a compatible setup. Tell the fitter which bicycle is being adjusted and whether you use another bike with a different purpose.
Prepare a short description of your goal: for example, reaching the brakes comfortably, selecting between two frame sizes, sustaining the extensions for a controlled ride, or investigating a repeatable pressure point. Note when an issue appears, the route or duration, recent changes to training or equipment and what you have already tried. Do not self-diagnose a pain source; share relevant clinical restrictions or guidance if you have it.
Ask about the time required, what the fee includes, whether parts are extra and how follow-up works. Arrive ready to pedal at a normal, safe effort, but do not ride through illness or severe pain to make the appointment “representative.” If you have an acute or worsening health concern, ask the clinician whether a fitting or cycling session should wait. The fitter can observe a baseline and explain the adjustments; you should leave knowing what changed and how to test it.
Test position changes over more than a few pedal strokes
A stationary assessment is only one step. Before using a new position in a race or a long workout, confirm that it remains comfortable and controllable during the kind of riding you do. If the fitter gives you a written setup, keep it with the bicycle measurements and make a note of parts changed. This makes it easier to reproduce the position or reverse a setting if a problem appears.
Start with a short, easy ride in a safe place where you can stop. Check steering, braking, shifting and visibility from each hand position. Then extend the test only if the setup remains comfortable and your control is unaffected. On a triathlon bike, practise getting into and out of the extensions and reaching the brakes before using that position in traffic. Do not test a new aero setup in a group or on a technical descent.
Compare the result with your baseline: where you felt pressure, whether you could breathe and look ahead, how long the position felt sustainable and whether any new symptom appeared. A single ride cannot prove an aerodynamic or injury outcome, and pace or power can be affected by wind, fatigue and course. If discomfort or numbness worsens, handling is uncertain or you cannot reach the brakes, stop and revert to a safe position. Contact the fitter about the setup; seek clinical advice for persistent or concerning symptoms. Make one adjustment at a time rather than layering changes.
Signs you need a bike fit
A fitting may be useful when you repeatedly cannot find a comfortable or controllable position, but a symptom does not identify its cause. Discomfort can reflect bike setup, equipment, training load, technique, medical factors or several of these together.
Consider professional setup help if you have persistent pressure at a contact point, struggle to reach the brakes, cannot steer comfortably from the position you plan to use, or find that a new frame or cockpit cannot be adjusted to a usable posture. Bring a specific observation such as “my hands go numb after this route” or “I cannot see ahead while on the extensions.” Those descriptions help the fitter investigate without assuming the answer.
Knee, back, neck or foot pain is not a reliable do-it-yourself diagnostic chart. Front-of-knee pain does not prove the saddle is too low; outside-knee pain does not prove cleat rotation is wrong. Do not keep moving the saddle or cleats in response to a pain label alone. If symptoms are sudden, severe, persistent, worsening or affect everyday movement, stop or reduce the activity and seek suitable medical advice. A fitter can discuss bike contact points, but clinical diagnosis belongs to an appropriately qualified health professional.
Also check basic equipment condition. A slipping seatpost, loose bars, worn cleats, damaged shoes or failing brake can feel like a fit problem and may be unsafe. Repair faults before evaluating fine position changes.
Cost and value: what to compare
Fitting prices and service packages vary by country, shop, fitter, equipment, session length and follow-up. A quoted amount is not a reliable global average, and this page does not promise that a fit will repay its cost in speed, watts or avoided medical bills. Compare what is actually included rather than choosing by the number of cameras or the “premium” label.
Before booking, ask whether the price includes an intake conversation, assessment on your own bike, cleat and saddle adjustments, triathlon extensions, a written record, parts, and follow-up. Check whether additional components or another appointment cost extra. A service that does not adjust your current bicycle may still provide useful measurements, but ask how the result transfers to your actual bike and whether your frame can reach the proposed position.
Set a spending limit based on the decision at hand. If you are buying a new bicycle, sizing advice before purchase can help you compare frames and adjustment range. If your bike is already safe and comfortable, a paid fit may be less urgent than replacing worn tires, maintaining brakes or buying a helmet that fits. Use the triathlon cost calculator to include fitting, maintenance, travel and other costs in your broader budget.
Consider value in practical terms: a clearly documented position you can reproduce, a problem investigated without a guaranteed diagnosis, and a plan to reassess any changes. A fit is not a substitute for clinical care, and an expensive service cannot make a position suitable if the bike does not fit or the rider cannot control it.
DIY bike fit vs professional fit
A careful home check can find an obvious setup or safety problem, but fixed body-measurement formulas are only rough starting points. They cannot see how you move, how the bicycle handles or what is happening at a contact point over time.
For a home baseline, use the same shoes and bike, check that the saddle, bars and cleats are secure, and photograph the bicycle from the side on level ground. Note which hand positions you can use, whether you can reach the brakes, and how the position feels during a familiar easy ride. Change only one modest, reversible variable at a time, write down the original measurement and test the change in a safe setting. Do not use a knee-over-pedal plumb-line test, a standing saddle-height formula or a universal joint angle as a mandatory target for everyone.
A professional may be useful when you need to choose a frame, set up triathlon extensions, reconcile a persistent equipment problem, compare a position over a longer session or understand adjustments that exceed your experience. Their tools can measure movement and angles, but interpretation and a safe testing process still matter.
Do not try to treat pain by repeatedly changing cleats or saddle position. Restore the last comfortable setup if an adjustment causes new symptoms or poorer control, and seek clinical input when symptoms persist or are concerning. Keep basic mechanical safety separate from fit: bolts must be tightened to the manufacturer’s instructions and a bicycle with a loose cockpit should not be ridden.
How to choose the right bike: beginner to advanced
Choose a frame and cockpit that can reach a safe, sustainable position for the riding you expect to do. Road, endurance and triathlon frames place the rider differently and offer different adjustment ranges; no single geometry is best for all athletes or all courses. A road bike may suit general training and group riding, while triathlon extensions can add an aerodynamic position only when the rider can steer and brake safely from the intended setup.
Compare stack and reach as parts of a larger fit conversation, not as a complete sizing answer. Manufacturer size labels are not standardized, and two frames with a similar nominal size can position the rider differently. Ask about adjustment limits, stem and spacer changes, seatpost and saddle range, extension compatibility and brake reach. Test ride when possible and confirm that the bicycle can be adjusted without unsafe component positions.
Before buying, compare total cost: frame, fit, pedals, shoes, maintenance and any required cockpit components. A fitter can sometimes help screen frame options before purchase; confirm whether that advice includes a follow-up after delivery. The triathlon bike guide and road bike versus triathlon bike comparison explain the equipment trade-offs.
Common bike fit mistakes
Common errors come from treating one measurement or one person’s position as a universal target:
- Copying an elite setup: training history, body proportions, mobility, equipment and event demands differ. A professional’s position is not a template for another rider.
- Changing several contact points at once: when comfort or control changes, you cannot tell which adjustment mattered. Keep a record and test one change at a time.
- Chasing a lower front end: a low posture is not automatically faster in a whole race if it reduces control, sustainable power, breathing or the ability to look ahead.
- Treating symptoms as a diagnosis: pain can have several causes. Avoid moving a saddle or cleat solely from a chart that maps one location to one adjustment.
- Assuming expensive technology guarantees quality: motion capture and pressure mapping are tools. Ask how findings inform a practical test and whether you receive a documented result.
- Leaving equipment faults in place: worn cleats, a moving seatpost or loose bars need a mechanical check, not a performance fit.
- Expecting one session to settle every future position: fitness, equipment and goals can change. If you have a follow-up included, use it to discuss what happened on actual rides rather than making a large change just before an event.
The goal is a position that fits the rider, bike and use case, with enough control to ride safely.
Practical bike setup checklist
Use this as a conversation and observation checklist, not an angle test or a pass/fail medical screen.
Before a fitting or adjustment
- Bring the bicycle, shoes, pedals, cleats, helmet and the kit you actually use.
- Describe the kind of riding, event, terrain and hand positions you want to support.
- Note where discomfort occurs, when it begins, what changes it, and whether it appears off the bike. Do not assume the cause.
- Check whether any part is worn, slipping or damaged and arrange repair before fine adjustments.
- Write down current saddle, cleat and cockpit positions so a change can be reversed.
During a test ride
- Can you reach brakes and controls while maintaining the planned position?
- Can you see ahead, steer predictably and change hand position when needed?
- Does discomfort, numbness or a new symptom appear or worsen?
- Can you use the position for an appropriate portion of the planned session, rather than holding it for a few seconds in a fitting studio?
If a position creates pain, unsafe handling or difficulty braking, stop the test and return to a safe setup. Seek clinical help for concerning symptoms; ask the fitter about equipment or position limits. A checklist cannot decide that an injury is present or that a setup is safe for every rider.
Choosing the right fit for your climate and terrain
Describe your actual riding conditions to the fitter. A position assessed on an indoor trainer may feel different outdoors when road vibration, wind, gradients, traffic and the need to look around are added. Ask how the position will be checked in a setting that resembles your use without exposing you to unnecessary risk.
For hilly courses, explain how often you expect to climb seated, stand, descend and use the brakes. For a windy course, discuss the control demands of your frame, wheels and hand positions; do not assume that a generic pad width or lower front end is safer in crosswinds. For hot events, mention clothing, drinking access and whether the posture feels comfortable for breathing, but do not treat a bike fit as heat-safety advice.
An indoor trainer can help reproduce a measured position, but leveling the front wheel alone does not establish that indoor and outdoor posture are equivalent. Confirm how your trainer holds the bike and check manufacturer instructions. If you use multiple bicycles, record a setup for each rather than assuming measurements transfer exactly. Build changes gradually in ordinary training and reassess after equipment, injury, mobility or goal changes.
DIY Fit vs Professional Fit Comparison
| Factor | DIY Fit | Basic Pro Fit | Full Biomechanical Fit |
|---|---|---|---|
| Cost | Free – $20 (app) | $100–$150 | $300–$500 |
| Time | 30–60 min | 60–90 min | 2–3 hours |
| Saddle height | ✓ Approximate | ✓ Precise | ✓ Precise + validated |
| Reach & stack | ✓ Basic | ✓ Adjusted | ✓ Optimised |
| Cleat alignment | ✗ Difficult | ✓ Included | ✓ Pressure-mapped |
| Aero position | ✗ Not recommended | ✓ Basic setup | ✓ Wind-tunnel level |
| Motion analysis | ✗ No | ✗ Usually no | ✓ Camera-based |
| Injury prevention | Moderate | Good | Excellent |
| Best for | Casual riders | Beginners & intermediate | Ironman & competitive |
Recommended gear
Affiliate disclosure: Brick to Brick may earn a commission from qualifying purchases, at no extra cost to you. Read our full affiliate disclosure. Unless a named method says otherwise, these are research-based recommendations rather than first-hand product tests.
Bike Fast Fit App
Phone-based angle measurement tool for DIY bike fitting. Measures knee angle, hip angle, and back angle using your phone camera.
View on AmazonISM PS 1.0 Saddle
Split-nose triathlon saddle designed to reduce pressure and improve comfort in the aero position. A top choice after bike fitting.
View on AmazonWahoo KICKR Smart Trainer
Premium smart trainer for indoor training. Pairs perfectly with a professional bike fit to maintain your position year-round.
View on AmazonSources
Sources are listed so readers can verify consequential claims and dated details.
- Cycling position optimisation: a systematic review of the impact of positional changes on biomechanical and physiological factors in cycling — Journal of Sports Sciences (accessed September 25, 2026)
- Effects of Bike-Fitting on Lower Back Pain in Cyclists: A Systematic Review — Cureus (accessed September 25, 2026)
Frequently asked questions
Can a bike fit guarantee a faster triathlon time?
No. A fit may help assess position, comfort or control, but speed depends on many factors and there is no universal time saving. A position also needs to be sustainable and safe for the rider.
Does knee pain mean my saddle is at the wrong height?
Not necessarily. Pain has multiple possible causes, and its location alone cannot diagnose saddle height or cleat position. Avoid repeated adjustments as treatment and seek clinical advice for persistent or concerning symptoms.
Do I need a professional fit when buying a bike?
A sizing conversation before purchase can help compare frame dimensions and adjustment range, especially for a triathlon setup. Ask what the service includes and whether it checks the actual bike after delivery.
How often should I get a bike refit?
There is no universal annual schedule. Reconsider fit after a meaningful change to equipment, riding goals, comfort or body movement; a comfortable setup does not require a paid session just because a year has passed.
Is a DIY bike fit accurate enough?
Home checks can catch obvious setup or safety issues, but fixed formulas and single angles are not universal targets. A fitter may help when frame choice, triathlon extensions, control or a repeatable setup question exceeds your experience.
What should I bring to a bike fitting?
Bring the bicycle, current shoes and cleats, helmet, usual kit, and any extensions you intend to use. Describe your riding goal and observations without assuming a symptom’s cause; ask about service scope and follow-up.