Open-Water Sighting and Breathing: A Practice Progression
Learn a low-lift sighting sequence, choose useful landmarks and practise breathing adjustments in supervised open water before racing.
By Lotte
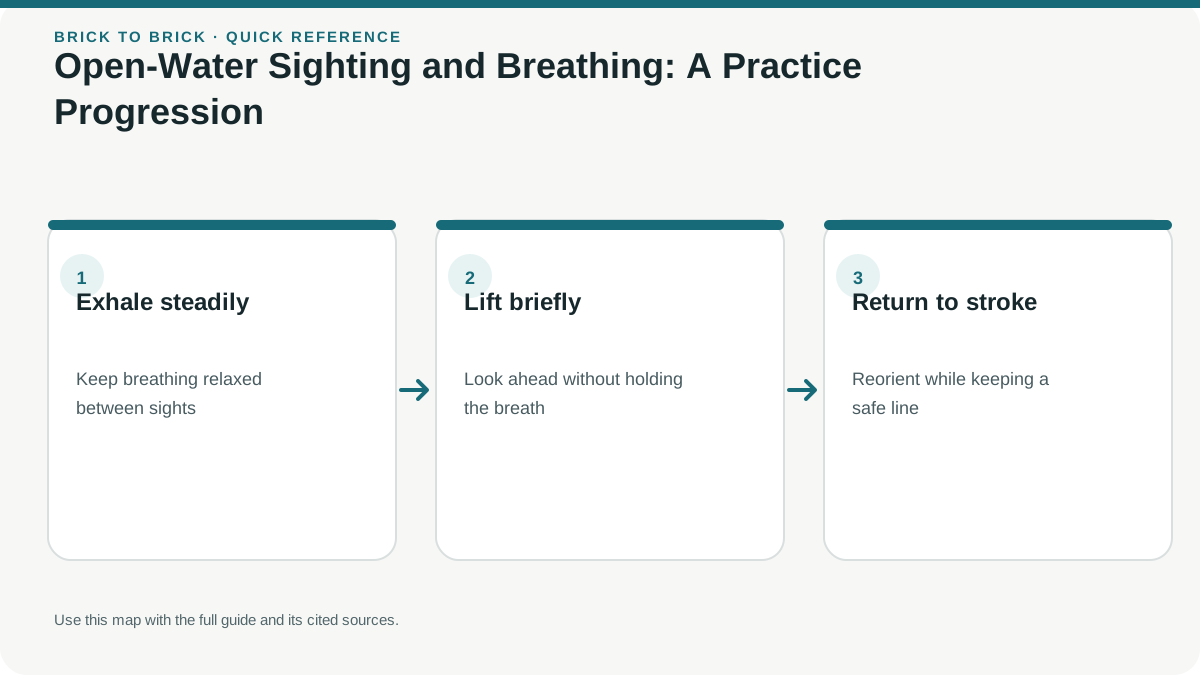
Open-water sighting means briefly checking your direction while preserving breathing and forward movement. Practise the movement in a pool first, then adapt it to landmarks and conditions in supervised open water; there is no universal number of strokes between sights.
In this article
- 1Set the safety conditions before the technique task
- 2Learn a brief look without holding the head high
- 3Choose landmarks that remain useful
- 4Adjust how often you sight from actual drift
- 5Practise breathing choices without restricting air
- 6Use a short course rehearsal and debrief
- 7Recognize when to stop and reset navigation
- 8Choose a breathing side that fits the conditions
- 9Understand why a straight-looking route can still drift
- 10Read the course shape before deciding where to look
- 11Practise orientation without turning every length into a test
- 12Make a gradual open-water practice ladder
- 13Adjust the look when other swimmers are nearby
- 14Use breathing flexibility without forcing bilateral symmetry
- 15Recognize common navigation errors early
- 16Create a short debrief that improves the next session
- 17Bring the technique back to the event briefing
- ?Frequently asked questions
Set the safety conditions before the technique task
Use a supervised venue or an appropriate organised session, check local conditions and know entry, exit and help procedures. RNLI guidance recommends planning the swim and using suitable visibility and safety arrangements.
A bright cap or tow float can improve visibility in training, but neither replaces swimming ability or safety cover. Race equipment permissions may differ from training practice.
Do not test navigation by swimming alone farther from shore. If conditions exceed your ability, practise in the pool or postpone the session.
Learn a brief look without holding the head high
In a pool, choose a visible object ahead and practise lifting only enough to see it before returning to normal alignment. The aim is a brief check, not swimming continuously with the head up.
A common coached sequence separates the forward look from the side breath: look ahead briefly, return into the stroke and breathe to the side as appropriate. The exact coordination should fit your ability and conditions.
Use short repetitions with plenty of control. If you repeatedly swallow water or lose rhythm, slow down and ask a coach to observe rather than forcing a fixed pattern.
Choose landmarks that remain useful
Before entering, identify the course direction and a large stable landmark aligned with the intended route where possible. A distant building or treeline feature may be easier to recognise than a small buoy hidden by swimmers.
Recheck the landmark when the course turns. A useful reference for one leg can send you off course on the next. Do not navigate solely by following another athlete, who may also be drifting.
Sun glare, waves and low visibility can change what you can see. Keep a backup reference and follow the organiser's current course markings.
Adjust how often you sight from actual drift
Start with frequent enough checks to stay oriented during a supervised short swim. If you are swimming straight and visibility is good, you may be able to reduce unnecessary checks. If waves, current or traffic disrupt the line, check more often.
There is no fixed six-stroke or eight-stroke rule that fits every swimmer and course. A sighting interval is useful only if it keeps you on the intended route without overwhelming breathing.
Compare actual direction with what you expected. A GPS track can be noisy, so use coach observations and visible course references as well.
Practise breathing choices without restricting air
In supervised practice, learn to breathe comfortably to either side if appropriate for your ability. That gives options when waves or nearby swimmers make one side awkward. It does not mean you must alternate sides every three strokes throughout a race.
Do not deliberately hold your breath for long periods as a sighting drill. If you lose control of breathing, stop the task and use the agreed safety procedure.
For basic stroke and breathing development, use improving your swim. This page applies those skills to orientation in open water.
Use a short course rehearsal and debrief
At a permitted supervised venue, practise a short out-and-back or marked loop suited to your ability. Before starting, name the reference points, turn direction and exit. Afterward, note where you lost the line and why.
Progress by making the task more realistic only when the simpler version is comfortable. Do not add distance, rougher conditions and close-group swimming at once.
For race day, know the first target and the help signal. Good sighting supports safe navigation; it is not a reason to ignore conditions or chase a faster swimmer beyond your capacity.
Choose a breathing side that fits the conditions
A swimmer may breathe toward a side with less chop, less glare or a clearer view of the course, then switch when the direction changes. This is a situational option, not a rule to breathe toward shore or alternate sides on a fixed count. Your comfortable stroke, waves, other swimmers and course layout all affect the choice.
Practise looking ahead briefly and taking a normal side breath without holding air or lifting the head for several strokes. If one side is difficult, work on that coordination in a pool with instruction before relying on it in open water. Do not force a new breathing pattern in rough or cold conditions.
During an organized session, tell the supervisor what route you plan to swim and how you will signal if you need help. If you need to pause to regain breathing, follow the site's procedure. Breathing flexibility is useful only when it supports controlled swimming and safe orientation.
Understand why a straight-looking route can still drift
In a pool, lane lines and walls supply constant information about direction. In open water, swimmers have fewer visual references and may turn their head differently to breathe, follow nearby athletes or compensate for waves. A small repeated deviation can add distance even when each stroke feels smooth. That does not mean the athlete needs a universal sighting count; it means the navigation task needs practice alongside the stroke.
Notice the shape of a track rather than judging one glance. A consistent curve to one side may come from stroke asymmetry, breathing habits, current or an inaccurate landmark. A GPS file can suggest a pattern but may be noisy, especially near shore or among other devices. Ask a qualified coach or use visible markers from a supervised venue to verify what you see.
If the route repeatedly bends, do not immediately lift the head higher or sight more often. First check whether the reference is truly aligned with the route and whether environmental conditions changed. A useful adjustment is the smallest one that restores direction without disrupting breathing or safety.
Read the course shape before deciding where to look
Before entering the water, study the event map and briefing. Identify the start, each turn, the side of each buoy that must be passed, the finish, any current or shoreline feature and where help is available. A large shore landmark may help you aim toward the next turn, but it does not replace the required buoy sequence or the official instructions.
A course with a long straight leg and one turn needs different references from a triangular loop or a beach out-and-back. The next turn marker may be obscured when swimmers approach it, so select an intermediate visual feature only when it clearly aligns with the official route. Recheck the reference after the turn; the correct landmark for the outbound leg may point away from the return.
If the organizer changes the course or water conditions, follow the updated briefing. Do not assume an old map, race report or practice route is still accurate. Ask an official if the required side of a marker or a safety boundary is unclear.
Practise orientation without turning every length into a test
Pool practice can isolate the forward glance while walls, lane ropes and supervision remain available. Use a visible target at the far end and swim a comfortable distance, then check whether the head returns to its normal position and breathing remains controlled. You can alternate ordinary lengths with short orientation practice instead of sighting on every stroke.
Keep the objective simple: recognize the target, make a brief look and return to the stroke. If the movement disrupts breathing or causes you to stop abruptly, shorten the task and ask a swim coach for feedback. Follow pool rules about lane sharing, standing and equipment; do not place a small floating marker where it could be a hazard.
Pool practice does not reproduce waves, glare, current, cold or other swimmers. It is a way to learn one movement before practising in suitable supervised open water. There is no need to make a pool set resemble a mass start to benefit from the isolated drill.
Make a gradual open-water practice ladder
Progress by changing one feature at a time in an organized or otherwise appropriately supervised venue. Begin with easy swimming where you can remain near the entry and exit points. Add a short, clear target only when the basic setting feels manageable. Later practice can include a turn, a second landmark or other swimmers at a distance, depending on the venue's safety support and your ability.
Do not combine longer distance, rougher water, colder temperature, group contact and a new wetsuit in a single first attempt. If one variable is uncomfortable, return to an easier version or stop. Ask the session supervisor or coach what conditions and course layout are suitable. Use event-like practice only when the site permits it and the safety cover is adequate.
RNLI guidance recommends checking conditions, choosing a suitable location, going with a buddy and being prepared to cancel. Exact water-safety advice varies by country and venue; use the local authority or lifeguard instructions as well. A tow float or bright cap may improve visibility in training but does not replace safety cover or ability to swim.
Adjust the look when other swimmers are nearby
A cluster of swimmers can obscure a buoy and make the direction feel uncertain. Avoid swimming directly onto someone else's feet or changing direction sharply without checking the space. A brief orientation look can help you maintain your own line, but it should not replace awareness of the people around you. Follow the event's passing and course rules.
If the route is crowded, choose a line that leaves room for others and does not take you outside the course. Do not follow a swimmer who appears to cut a turn. If contact or confusion makes you uncomfortable, slow, move clear when safe and use the event's help procedure if needed. In practice, arrange a group drill only with a coach or supervisor who can manage spacing.
The goal is not perfect separation from other athletes; race swims may involve contact. The goal is to preserve your own breathing and orientation while reducing avoidable collisions. If you cannot see a clear route or remain calm, pause according to supervision rather than pressing into the group.
Use breathing flexibility without forcing bilateral symmetry
Being able to breathe to either side can provide options, but a swimmer does not need to use a perfectly alternating pattern. Choose the side that supports a comfortable breath and the course view available. If wind-driven chop repeatedly reaches one side, a different breathing side may help; if switching makes you inhale water or lose rhythm, use the pattern that remains controlled and work on alternatives separately.
Practice changes in a pool first. Keep the exhale relaxed and avoid long breath-holds, rapid hyperventilation or restrictive hypoxic drills. If a side breath feels panicked, return to a comfortable pattern, shorten the length or stop and get instruction. Breathing technique cannot compensate for unsafe conditions or a swimmer who is not ready for open water.
At a race, follow the course and safety instructions, and do not turn toward another swimmer so abruptly that you collide. Choose the visual reference before changing the breathing side when practical. The movement should remain small enough to preserve balance and awareness.
Create a short debrief that improves the next session
After supervised practice, note the venue, conditions, route, reference points, breathing side and what happened when you changed direction. Record whether you drifted, lost the landmark, had difficulty seeing buoys or felt your breathing become uncontrolled. Keep the note factual rather than scoring yourself as good or bad at open water.
Choose one adjustment for the next suitable session. It might be a better landmark, a calmer route, a shorter practice or a coaching cue. Do not change route, stroke, breathing side and distance all at once. If you experienced anxiety or cold-related difficulty, discuss the event with a qualified coach or clinician as appropriate before increasing exposure.
If the session was disrupted by unsafe weather, a venue closure or missing supervision, record that and choose another date or setting. A cancelled practice is a sound safety decision, not lost preparation that must be replaced by a riskier swim.
Bring the technique back to the event briefing
A familiar sighting movement is only one part of race readiness. Read the current athlete guide for course direction, buoy placement, start procedure, swim cap, wetsuit decision, cutoffs, prohibited equipment and the location of water-safety staff. These details can change between event editions or on race morning.
Before the start, identify the first required turn and the nearest visible reference. If the water looks different from practice, adjust the plan conservatively and follow officials. Do not enter a closed area or practise after a safety closure. If you feel unable to swim the course safely, speak to event staff about your options rather than trying to prove readiness in the water.
Open-water sighting is a way to navigate while swimming; it is not a promise that every course is safe or that every athlete should start. Use the open-water anxiety guide and open-water practice guide for related preparation decisions.
Sources
Sources are listed so readers can verify consequential claims and dated details.
- Open-water swimming safety — RNLI (accessed September 24, 2026)
- Float to live: regaining control and seeking help — RNLI (accessed September 24, 2026)
Frequently asked questions
Can I learn open-water sighting in a pool?
You can practise the brief forward glance and returning to normal breathing in a pool where permitted. That helps isolate the movement, but it does not reproduce navigation, waves, visibility or safety demands outdoors. Progress to suitable supervised open water when ready rather than treating the pool drill as complete preparation.