Bike Handling for Triathletes: A Safe Skills Progression
Practise braking, turning, observation and bottle access in a controlled setting, then connect those skills to realistic race-course demands.
By Lotte
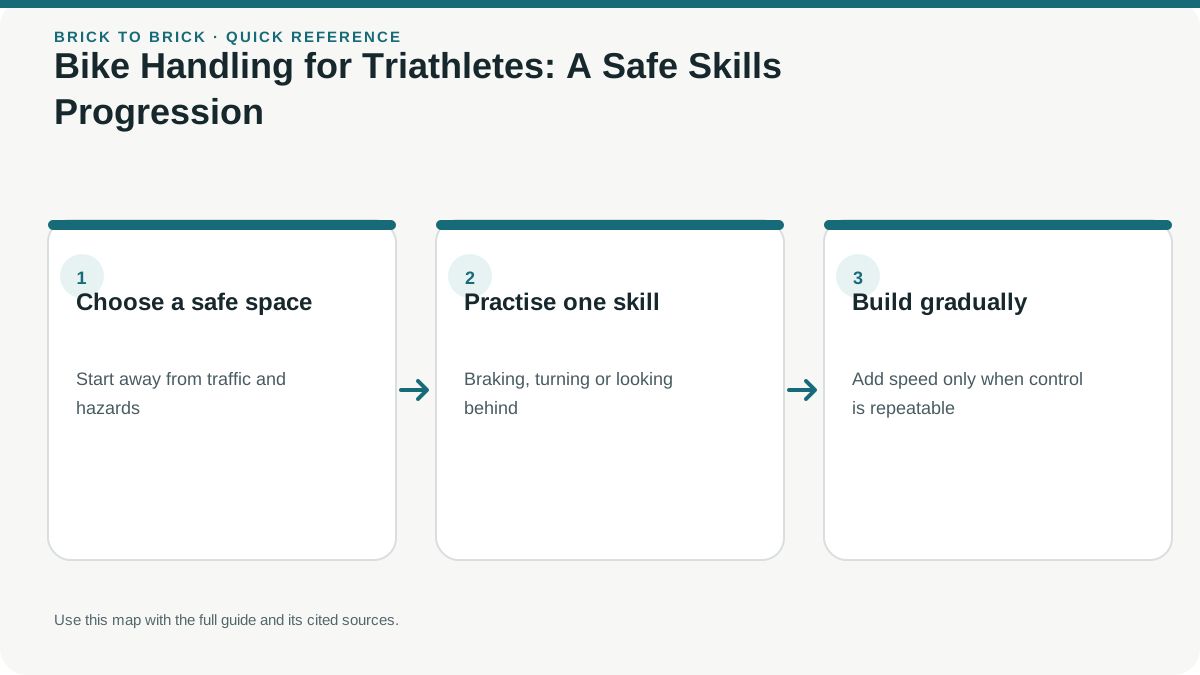
Bike handling for triathlon starts with reliable braking, steering and observation before speed or aerodynamic position. Practise one skill at a time in a safe permitted area, ideally with qualified instruction, and only progress when control is repeatable.
Key takeaways
- 1Use the current course map and athlete guide to identify the skills your event actually demands.
- 2Learn starts, stops, straight riding and controlled turns before adding one-handed or aero-position tasks.
- 3Practise where riding is permitted, away from traffic and pedestrians, with a bike and equipment you already know.
- 4Reduce speed or stop when weather, fatigue, equipment, or visibility makes control uncertain.
- 5Local road laws and event rules govern; coaching and a simpler course are sensible options when needed.
In this article
- 1Choose the practice setting and inspect the bike
- 2Practise controlled slowing and stopping
- 3Turn at a speed that preserves options
- 4Add observation and one-handed tasks carefully
- 5Rehearse race-specific situations separately
- 6Evaluate control rather than bravery
- 7Build a handling session with clear stopping points
- 8Read a corner before choosing a line
- 9Start from the demands of your actual race course
- 10Choose a practice area and define a stopping rule
- 11Rehearse starts, straight riding and stops before tighter skills
- 12Practise braking as a planned change in speed
- 13Build cornering from broad arcs to course-like turns
- 14Check behind and signal without losing the line
- 15Make bottle access optional and deliberately low risk
- 16Add shifting and aero position only after basic control
- 17Practise race procedures without attempting tricks
- 18Use a progression table to decide what to practise next
- 19Adjust practice for weather, fatigue and equipment changes
- 20A short session template with a clear measure of control
- 21When to ask for a coach or choose a simpler course
- ⚖A safe progression for triathlon bike-handling practice
- ?Frequently asked questions
Choose the practice setting and inspect the bike
Use an open, predictable area away from traffic and pedestrians where cycling practice is permitted. Check brakes, tires, wheels and steering before starting. Wear an appropriate correctly fitted helmet.
Begin on a familiar bicycle and pedal system. New aero bars, deep wheels or clipless pedals add variables that can wait until basic control is secure.
NHTSA's bicycle-safety guidance emphasises a functioning bike, visibility and predictable riding. Local road law governs public-road practice; a triathlon course is not permission to ignore it.
Practise controlled slowing and stopping
At low speed, learn how the bicycle responds to progressive braking with both controls as appropriate to the bike. Keep a stable position and look ahead. A qualified instructor can help you practise stronger stops safely.
Increase the challenge gradually, leaving ample stopping distance and avoiding slippery or unpredictable surfaces. Do not begin with maximum-speed emergency braking.
Practise starting and stopping until unclipping or placing a foot down feels reliable. If the pedal system creates repeated difficulty, simplify it before attempting race transitions.
Turn at a speed that preserves options
Look through the intended path and reduce speed before the turn as needed. Use a controlled line and avoid abrupt steering. Cornering technique varies with surface, speed and bicycle, so learn it under appropriate instruction.
Practise wide turns before tight U-turns. Use markers with generous space and gradually reduce the turn radius only when comfortable. Avoid looking down at the front wheel instead of the path.
On descents, use the hand position that gives immediate access to braking and control. Aerodynamic position is optional when visibility, traffic or conditions demand something else.
Add observation and one-handed tasks carefully
Practise looking behind while keeping a straight line in a controlled area, then signalling. Progress to brief one-handed riding only when you can retain control. Do not reach for a bottle in traffic as your first attempt.
With the bike stationary, learn the bottle location and grip. Then practise a short reach at low speed in a safe area before drinking while moving. Stopping to drink remains a valid option.
Avoid treating bunny hops or elaborate tricks as essential beginner triathlon skills. Basic predictable riding solves more common race situations.
Rehearse race-specific situations separately
Practise approaching a mount line, stopping before a dismount line and walking the bike through a stationary transition sequence. You do not need a flying mount to race effectively.
For aid stations, learn the event's procedure and slow predictably. For passing, follow the drafting-rules guide and the actual rulebook.
Group rides require their own etiquette and safety instruction. Do not use aero bars in a group where they are prohibited or where they limit access to brakes.
Evaluate control rather than bravery
A skill is ready to progress when you can repeat it without abrupt corrections, panic or loss of awareness. If wind, rain or fatigue removes that control, simplify the task or stop.
Record the specific difficulty: looking behind, tight turns, bottle return or braking confidence. Ask a coach for targeted help rather than assuming all handling problems need more speed.
Use the race-selection guide to choose a course that matches current skills. The goal is predictable control throughout the ride, including when you are tired.
Build a handling session with clear stopping points
Choose a traffic-free permitted space and set up a simple progression: start and stop, wide turns, controlled slowing before a turn, looking behind while holding a line, then an appropriate one-handed task. Use soft visual markers where allowed and leave generous space.
Advance only when the current task is repeatable at a modest speed. If you wobble while reaching for a bottle, return to a simpler version or stop to drink. Aerobars, close riding and faster corners should not be added to disguise uncertainty with momentum.
End with one ordinary skill you can perform confidently. Record the task to repeat next time rather than labelling the session good or bad. An instructor can identify a useful cue when practice stops producing improvement. Safe handling is a continuing skill, including for strong indoor cyclists.
Read a corner before choosing a line
On ordinary riding routes, look ahead early enough to notice surface changes, visibility, junctions and other road users. Choose a speed that leaves you options. A route used for an event may still have hazards, and familiarity does not guarantee that the surface is unchanged.
Practise basic turning in a suitable controlled setting before increasing speed. Keep the task simple: approach at a manageable pace, slow appropriately before the turn and maintain awareness of the exit. Obtain instruction when braking, body position or line choice is uncertain.
Avoid using a public descent as a test of bravery or comparing corner speeds with someone whose skill and equipment differ from yours. A fast straight-line rider may still need substantial handling practice. If rain, wind or a mechanical concern changes the conditions, reduce the demand or stop. A skill is useful because it preserves control under realistic circumstances, not because it produces the highest speed on a training file.
Start from the demands of your actual race course
Bike handling is not a stunt checklist. It is the ability to control the bike predictably while noticing other athletes, road users, markings and changing surfaces. Before choosing a drill, read the event's current course map and athlete guide. Look for narrow roads, sharp turns, roundabouts, steep descents, rough pavement, aid stations, a crowded mount line, and any rule about drafting or passing. These features tell you what deserves practice; a flat, closed course and a technical public-road course do not ask for the same preparation.
USA Triathlon describes basic race-relevant skills such as holding a line, turning, drinking, and passing or being passed. Treat that list as a starting point, not a universal pass certificate. Your event organizer and the rules that govern your race determine the procedures and equipment requirements. If you cannot comfortably control the bike on a normal ride, improve that foundation before adding speed or race-day complexity.
Write down one course demand you can practise safely and one you cannot reproduce. For the second, consider a coached clinic, an alternate practice venue, or choosing a different first event. You do not need to recreate a risky descent or a live aid station to be prepared for the race.
Choose a practice area and define a stopping rule
A quiet, level, permitted paved area with good visibility gives you room to repeat basic tasks without mixing them with traffic. Check for pedestrians, parked cars, curbs, drains, loose gravel, driveways and other people before setting up. Use soft markers only where the venue allows them, and leave enough space to stop or change direction without entering someone else's path. An empty parking area is not automatically closed to vehicles, so confirm that riding practice is permitted there.
Before you start, inspect the bicycle and decide what would end the session: a brake or tire problem, a loose component, poor visibility, rising wind, unexpected traffic, or fatigue that makes control unreliable. Wear a properly fitted helmet and whatever visibility equipment local conditions or law require. Use the bicycle and pedals you can already control; do not combine first-time clipless pedals, unfamiliar aero bars and tight-turn drills.
Keep each repetition short and change one variable at a time. If the marker layout, speed, surface and task all change at once, you cannot tell what caused a wobble. Stop and reset when a drill becomes rushed. The point of the setting is to make learning safer and more legible, not to remove every possible hazard.
Rehearse starts, straight riding and stops before tighter skills
A controlled start and stop give you a foundation for almost every other task. Begin at a pace where you can look ahead, steer gently and stop with room remaining. Practise starting from a stable position, pedalling away without a sudden swerve, then slowing and stopping in a predictable area. Repeat using the hand position and pedal system you normally ride with. If clipping in or out is new, separate that practice from moving around markers and get instruction if you repeatedly lose balance.
Next, ride a broad straight corridor between visual markers without weaving. Keep your gaze toward the path ahead rather than down at the front wheel. If you drift, make a small correction and reset; do not try to prove that you can hold an exact line while distracted. Once riding straight feels ordinary, add a gentle turn with a wide radius, then return to a straight line and stop.
These are not fitness intervals. Rest between attempts and end the drill while attention remains good. You are looking for quiet, repeatable control, not a maximum speed or a certain number of flawless repetitions. If ordinary starts and stops still feel unpredictable, stay at this level or seek qualified instruction before practicing more complex race tasks.
Practise braking as a planned change in speed
The most useful beginner braking habit is to look ahead and make speed decisions early. Notice the turn, junction, queue or surface change before you reach it, then reduce speed while the bicycle is upright and moving in a predictable direction. Learn how your own brakes respond on the bicycle you ride; brake feel, setup, load, road surface and weather all matter. A mechanic should inspect brakes that feel weak, inconsistent, noisy in a concerning way, or different from normal.
In a controlled area, practise gradual slowing from a modest speed, then stopping with more space than you think you need. Increase the challenge only with a qualified coach and a clear, open run-out. Do not begin with a high-speed emergency-stop contest, and do not practise abrupt braking around other riders or in traffic. If a wheel locks, the bike skids, or you need a sudden steering correction, simplify the drill and ask an instructor to review the technique.
For a corner, decide on a safe entry speed before turning. Braking while leaned or on a low-grip surface can change how much control you have, so avoid treating a single braking slogan as a substitute for judgement and instruction. On a real road, obey local traffic law and leave enough distance to respond to other people. NHTSA's guidance is written for the United States; riders elsewhere should use their own road code and safety guidance.
Build cornering from broad arcs to course-like turns
Start with broad, visible turns at low speed. Look toward the space you intend to use, keep the bike's path smooth, and avoid a sharp handlebar input that surprises you. Use paired soft markers to make a wide arc, ride through it, and stop only after you are clear of the practice path. Then try the opposite direction. Change the radius gradually, and return to wide turns whenever your line becomes abrupt or you stop looking ahead.
The aim is not to copy an elite rider's body position. Your safe line depends on sight distance, surface, speed, tire condition, traffic and available space. A course may have a painted line, a curb or a drain near a turn; practice does not give you permission to cut across a lane or ignore other athletes. On public roads, stay within local traffic rules and do not block pedestrians or drivers to repeat a corner.
Only add a tighter turn or more realistic speed when a qualified coach considers it appropriate and the venue provides space. Descending on a public road is not the place to test a new technique. If a turn feels uncomfortable, slow down where safe, widen the arc, or walk the bike through the course feature during a preview if the event permits it.
Check behind and signal without losing the line
Looking over a shoulder can make a bike drift if the rider turns the whole torso or grips the bars unevenly. Practise the observation task separately in a wide, controlled area: ride straight at an easy pace, glance toward a large fixed marker, then return your eyes forward. Keep the glance brief and repeat at the same easy speed. If the bicycle weaves, stop the task and get feedback rather than trying to force a longer look.
Once a short glance is controlled, add a simple hand signal that matches the road code where you ride. Use a visual target and a generous space buffer. Signaling does not grant priority and does not replace checking whether a lane change or turn is safe. On a real road, ride predictably, signal in good time when appropriate, and make the maneuver only when local law and conditions allow it.
NHTSA advises U.S. cyclists to signal and look over a shoulder before changing position or turning. Traffic rules and accepted hand signals differ internationally, so use your jurisdiction's guidance. If looking back is difficult because of neck mobility, vision, bike fit or balance, ask a cycling instructor or clinician for an adaptation instead of practicing in live traffic.
Make bottle access optional and deliberately low risk
Drinking while riding is a useful convenience, not a skill worth risking a fall for. First learn the bottle's position and how its cage releases while the bicycle is stationary. Check that the bottle returns securely; a bottle that rattles loose can distract you or another rider. If the cage requires an awkward reach, consider asking a bike fitter or mechanic about placement before trying to solve the issue at speed.
If you choose to practise one-handed riding, start at a slow, steady pace in a broad area with no traffic, pedestrians or obstacles. Briefly relax one hand, then restore it to the bar; only progress to a short reach when control remains stable. Do not combine the first reach with drinking, turning, looking behind or changing gears. Stop if the bike wanders or you feel rushed. A coach can help identify a safer hand position and practice progression.
In training and racing, it is reasonable to wait until a straight, clear section, slow down, or stop somewhere safe to drink. Follow event instructions at aid stations. If another athlete is nearby or conditions are rough, prioritize control and predictable movement over taking a bottle at that moment.
Add shifting and aero position only after basic control
Smooth gear changes reduce the need for abrupt effort changes, but shifting can distract a rider who has not learned the controls. On a calm straight route or stationary trainer, identify each control and practise shifting at an easy effort. Then use one shift at a time on a familiar ride. Follow your bicycle and drivetrain manufacturer's instructions; avoid a gear combination or adjustment that causes chain noise, hesitation or a mechanical problem.
Time-trial or aero bars change reach and brake access. Practise moving between the base bar and aero position on a straight, traffic-free section where you can see well ahead. Keep hands near the controls when conditions require quick responses. Avoid using aero bars in a group or where event rules prohibit them, and do not assume a race course is closed to traffic unless the organizer explicitly says so. If you cannot look up, steer, or return to a braking position confidently, remain on the base bar and ask for fit or handling help.
Do not introduce a new cockpit, extension, brake lever, pedal system or saddle setup immediately before an event. Make one equipment change at a time, have safety-critical changes checked by a qualified mechanic, and take enough familiar rides to confirm the bike remains controllable.
Practise race procedures without attempting tricks
Mount and dismount lines, transition entrances, aid stations and passing zones are managed differently by race. Walk through the event's published diagram and instructions before practising. You can rehearse a simple sequence at low speed: approach a marked line, slow or stop where appropriate, dismount in the way you have learned, and walk the bicycle through a stationary transition setup. A flying mount is not required for a safe or successful first race unless your specific event says otherwise; check the applicable rules and organizer directions.
For passing and being passed, learn the event's drafting, lane and signaling rules. A non-drafting race and a draft-legal race have different spacing and tactics. Do not imitate another athlete's move if it conflicts with the rulebook or compromises control. If a course marshal, sign, or athlete guide gives an instruction, follow it.
An event preview can help you identify turns and surface changes, but it is not a time trial. Observe where you can see, where you can slow safely, and where you should expect other athletes. If the route seems beyond your current handling comfort, ask the organizer or a coach about alternatives before race day.
Use a progression table to decide what to practise next
Move to a harder task only when the easier one is calm and repeatable in conditions similar to the ones you are practicing in. One successful attempt is not enough if the next repetition is rushed or unstable. Use this simple ladder to choose a next step rather than combining skills all at once.
Adjust practice for weather, fatigue and equipment changes
Rain, gusting wind, glare, cold hands, unfamiliar surfaces and low light can change what you can control. They can also make hazards harder to see. Do not use a narrow lane, steep descent or public road as a practice lab when the weather is making visibility or grip uncertain. Reduce speed and task complexity, choose a different location, ride indoors for fitness, or cancel the handling drill. Safe decisions include deciding not to ride outside.
Fatigue matters because a skill that feels automatic early in a ride may be harder after a long session. Rehearse a few controlled decisions near the end of an ordinary ride only when the route is safe and your attention is intact. Do not deliberately exhaust yourself to test balance, braking or bottle access. If you become dizzy, confused, unusually weak or unable to control the bike, stop in a safe place and get help as needed.
Equipment changes deserve the same caution. New tires, bars, wheels, pedals, shoes or a different bicycle can change handling or control reach. Ask a qualified mechanic to check assembly and compatibility, then reacquaint yourself on a quiet route. Recheck tire pressures and components according to manufacturer guidance rather than copying another rider's settings.
A short session template with a clear measure of control
A practical handling session can be organized around one primary skill and one easier warm-up task. Begin with a bike check and a few minutes of ordinary riding in the practice area. Rehearse starts, straight riding and controlled stops. Then select one task tied to your race: broad turns, a shoulder glance, a brief bottle reach, or a shift while holding a steady line. Finish with the easier task again so you leave with a calm, familiar movement.
Afterward, record the skill, the setting, what changed, and the point where you chose to stop or step back. Useful signs of control are that you can repeat the action without a sudden correction, remain aware of your surroundings, and finish with enough space to stop. Those are personal observations, not a validated test or guarantee of safety. A coach can help define a progression if you are unsure what counts as stable.
Keep fitness training and technical practice distinct when useful. Hard intervals can wait until the route and basic skills feel familiar. The brick-workout guide helps you connect bike and run sessions; this page focuses on controlling the bicycle and protecting attention while you learn.
When to ask for a coach or choose a simpler course
Get instruction if you cannot brake smoothly, hold a predictable line, turn without panic, or manage the controls you plan to use. A cycling club, qualified coach, or local bike-skills program may offer a session suited to your experience. Tell the instructor that you are preparing for a triathlon and describe the course features that concern you. Coaching is especially useful when you have a history of falls, little experience riding in traffic, difficulty with clipless pedals, or uncertainty about an aero setup.
Ask a qualified mechanic to inspect a bicycle that has damaged parts, unreliable brakes, loose steering, repeated shifting problems or a crash history. Do not try to repair a safety-critical issue with a practice drill. If pain, weakness, dizziness, vision problems or medication effects interfere with riding, discuss that with an appropriate clinician.
Choosing an easier or closed-course first event can be a smart progression. Fitness does not automatically provide handling skills, and a course with technical descents or busy intersections may not be the right setting for a new rider. Build competence in the environment you can control, then choose a race that matches what you have practiced.
A safe progression for triathlon bike-handling practice
| Stage | Practice focus | Progress when |
|---|---|---|
| 1. Familiarize | Bike check, start, straight riding and controlled stop | You can repeat without rushing or losing awareness |
| 2. Turn | Wide arcs and gentle direction changes | Your line stays predictable and you can stop with room |
| 3. Observe | Brief shoulder glance and local hand signal | The bicycle stays controlled in a broad, clear area |
| 4. One-hand task | Stationary bottle check, then a brief low-risk reach | You remain stable; stopping to drink is still an option |
| 5. Race context | Course-specific procedures and rule review | You understand the organizer's instructions and limits |
Sources
Sources are listed so readers can verify consequential claims and dated details.
- Bicycle safety and predictable road behaviour — NHTSA (accessed September 14, 2026)
- What Do I Do on the Bike? — USA Triathlon (accessed September 23, 2026)
- Cornering — USA Cycling (accessed September 23, 2026)
- Basic Pack Skills — USA Cycling (accessed September 23, 2026)
Frequently asked questions
Should I practise emergency braking on a public road?
Choose a suitable controlled environment with space, visibility and appropriate instruction. Sudden braking near traffic or other riders can create the very hazard you are trying to prepare for. Learn how your brakes behave progressively and inspect the bike before practising.
What bike-handling skills should a beginner triathlete learn first?
Start with a safe pre-ride check, stable starts and stops, straight riding, controlled braking and broad turns. Add observation, signaling and one-handed tasks only in a suitable practice area and when you can stay in control.
Can I learn bike handling on an indoor trainer?
An indoor trainer can help you learn shifting or become familiar with a position, but it does not reproduce steering, braking, surface changes or traffic decisions. Add safe outdoor practice when possible, or seek instruction in a controlled venue.
Do I need to drink while riding in a triathlon?
No single bottle-taking drill is worth losing control. Rehearse only if you can do so safely in a clear area; slowing down or stopping somewhere safe remains a valid choice. Follow the event's aid-station and course procedures.
Should I practise with aero bars?
Learn the base-bar controls first. Then practise changing position and returning to the brakes on a straight, quiet route. Avoid aero bars in groups or wherever rules or conditions make them inappropriate, and confirm your event's current instructions.
When should I get help with bike handling?
Seek a qualified coach or skills clinic if braking, turning, looking behind, or using the controls feels unpredictable. Ask a mechanic to assess safety-critical bike problems, and choose a simpler course if its demands exceed the skills you can currently ride with confidence.
How often should I practise bike-handling drills?
There is no universal schedule. Short, focused practice that fits your experience and recovery is more useful than repeating a drill while tired or distracted. Stop when control or attention declines and ask a coach to help set a progression if you are uncertain.